Moen Bathroom Sink Faucet Handle Removal: Essential Aspects
Maintaining the functionality of your bathroom sink faucet is essential for a comfortable and efficient bathroom experience. The Moen bathroom sink faucet, known for its reliability and durability, may require handle removal for repairs or replacement. Understanding the essential aspects of Moen bathroom sink faucet handle removal is crucial to ensure a successful and hassle-free process.
This article delves into the key elements of Moen bathroom sink faucet handle removal, providing a comprehensive guide to help you tackle this task with confidence. By discussing the tools required, safety precautions, and step-by-step instructions, we aim to empower you with the knowledge and skills necessary for effective handle removal.
Tools and Materials Required
Before embarking on the faucet handle removal process, ensure you have the following tools and materials readily available:
- Allen wrench or hex key
- Adjustable wrench or pliers
- Soft cloth or rag
- New faucet handle (if replacement is necessary)
Safety Precautions
Prior to removing the faucet handle, it's essential to follow these safety precautions:
- Turn off the water supply to the faucet from the shut-off valves beneath the sink.
- Open the faucet to release any remaining water pressure.
- Protect your hands with gloves to prevent cuts or scrapes.
- Place a towel or cloth around the base of the faucet to prevent scratches during the removal process.
Step-by-Step Instructions
Follow these step-by-step instructions to remove the Moen bathroom sink faucet handle:
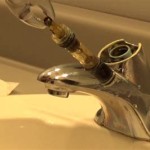
- Locate the set screw on the handle's base. It's typically hidden beneath a small plastic cap.
- Using an Allen wrench or hex key, carefully loosen the set screw by turning it counterclockwise.
- Gently pull the handle straight up to detach it from the faucet.
- If the handle is stuck, apply gentle pressure while pulling upward.
- Inspect the O-ring or washer behind the handle for any damage or wear. Replace if necessary.
- To reinstall the handle, reverse the steps. Tighten the set screw securely but avoid over-tightening.
Conclusion
By understanding the essential aspects of Moen bathroom sink faucet handle removal, you can tackle this task with confidence and precision. Remember to prioritize safety, gather the necessary tools, and follow the step-by-step instructions carefully. With proper execution, you can effectively remove the faucet handle, ensuring a functional and aesthetically pleasing bathroom sink.

How To Remove Moen Bathroom Faucet Handle In 2 Steps

How Do I Replace My Moen Bathroom Faucet Cartridge

How To Remove Moen Bathroom Sink Faucet Handles Mr Kitchen Faucets

Tighten A Loose Lever On Moen Brantford Faucet

Tighten A Loose Lever On Moen Brantford Faucet

How To Fix A Dripping Moen Faucet Howtolou Com

How To Remove Moen Bathroom Sink Faucet Handles Faucets
Moen Adler 4 Inch Centerset Single Handle Bathroom Faucet Replacement Ifixit Repair Guide

How To Remove Moen Bathroom Sink Faucet Handles Mr Kitchen Faucets

How To Replace Repair A Leaky Moen Cartridge In Bathroom Set Of Faucets Single Lever Tips
Related Posts

