Laying Tile Around a Bathroom Sink: A Comprehensive Guide
Tiling around a bathroom sink adds an elegant touch and protects the surrounding walls from moisture and spills. Here's a detailed guide to help you achieve a professional-looking finish:
Materials You'll Need:
* Ceramic or porcelain tiles * Tile adhesive * Tile spacers (cross-shaped) * Trowel (notched) * Grout and grout float * Sealant * Level * Ruler or measuring tape * Sponge or rag * Bucket * Mixing paddle (for adhesive) * Utility knife * Drywall saw (optional)Step 1: Preparation
* Remove the sink by disconnecting the plumbing and unfastening the mounting hardware. * Clean the wall surface thoroughly, removing any dirt, grease, or loose paint. This will ensure proper adhesion of the tile adhesive.Step 2: Measuring and Layout
* Measure the area around the sink where you will be tiling. This will determine the number of tiles needed. * Dry-lay the tiles on the floor to plan the layout. Start from the center of the sink outward, ensuring equal spacing between the tiles.Step 3: Applying Tile Adhesive
* Apply tile adhesive to the wall surface using a notched trowel. Hold the trowel at a 45-degree angle and spread the adhesive evenly.Step 4: Laying the Tiles
* Carefully lift each tile and apply a thin layer of adhesive to the back. * Align the tile with the layout plan and press it firmly into place. Use a level to ensure the tile is level. * Insert tile spacers between the tiles to maintain consistent spacing.Step 5: Cutting Tiles
* For tiles that need to be trimmed, use a utility knife to score them along the desired line. * Place the scored tile on a flat surface and snap it along the score line. * Alternatively, you can use a drywall saw for larger or more precise cuts.Step 6: Grouting
* Once the adhesive has cured, mix the grout according to the manufacturer's instructions. * Use a grout float to apply the grout to the joints between the tiles. Press firmly to fill the gaps. * Remove excess grout with a wet sponge or rag.Step 7: Sealing
* After the grout has dried, apply a sealant to the grout lines and around the edges of the tiles. This will help protect from stains and moisture penetration. * Allow the sealant to dry completely before reinstalling the sink.Tips:
* Use a laser level to ensure accuracy when laying the tiles. * Allow the adhesive to set for at least 24 hours before grouting. * Do not apply excessive force when pressing the tiles into place. * Clean up any excess adhesive or grout immediately to prevent stains. * If you are tiling a large area, consider hiring a professional tiler for optimal results.
How To Install A Tile Backsplash

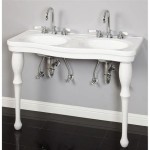
How To Tile Around Sinks Able Skills News

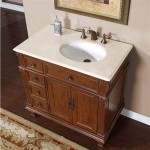
Tutorial How To Install A Bathroom Vanity The Diy Playbook

Home Dzine Bathrooms How To Tile A Bathroom Vanity

How To Tile Around Sinks Able Skills News

Backsplash Advice For Your Bathroom Would You Tile The Side Walls Too Designed

Small Bathroom Remodel Easy Diy Tile Backsplash Engineer Your Space

Small Bathroom Remodel Easy Diy Tile Backsplash Engineer Your Space

Backsplash Advice For Your Bathroom Would You Tile The Side Walls Too Designed

How To Install Backsplash Bathroom Tile Easy Simple