Replacing a Delta Bathroom Faucet: A Step-by-Step Guide
Replacing an outdated or malfunctioning bathroom faucet can significantly enhance the functionality and aesthetics of your bathroom. While it may seem like a daunting task, following a step-by-step guide can make the process straightforward and hassle-free. This article provides comprehensive instructions on how to replace a Delta bathroom faucet, addressing all the essential aspects.
Gather Necessary Tools and Materials
Before embarking on the faucet replacement, ensure you have the necessary tools and materials on hand. These typically include:
- Adjustable wrench
- Allen wrench
- Pliers
- Basin wrench
- Teflon tape
- New Delta bathroom faucet
- Replacement supply lines (if necessary)
- Plumber's putty
Shut Off Water Supply
Safety should be the top priority. Before removing the old faucet, it's crucial to turn off the water supply beneath the sink. This is usually done by closing the shut-off valves located under the sink or behind the access panel.
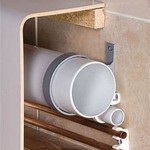
Disconnect the Old Faucet
Using the adjustable wrench, loosen and disconnect the nuts securing the faucet to the water supply lines. Then, remove the old faucet by unscrewing it counterclockwise from the sink.
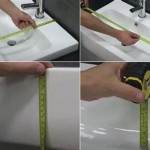
Clean the Mounting Surface
Once the old faucet is removed, clean the mounting surface thoroughly to eliminate any debris or old putty. Use a cloth or sponge with soap and water to clean the area where the new faucet will be installed.
Install the New Faucet
Apply a thin layer of plumber's putty around the base of the new faucet. Place the faucet over the mounting holes and carefully tighten the mounting nuts with the adjustable wrench. Do not overtighten.
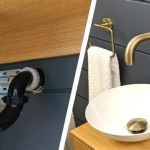
Connect the Supply Lines
Connect the supply lines to the corresponding hot and cold water connectors on the faucet. Tighten the connections with the adjustable wrench or pliers. If the supply lines are not long enough, replace them with new ones of appropriate length.
Reinstall the Escutcheon
Position the escutcheon (the decorative plate around the base of the faucet) over the mounting surface and align the holes. Secure it by tightening the screws with the Allen wrench.
Turn on Water Supply and Check for Leaks
Turn on the water supply and open the faucet to check for any leaks. If there are no leaks, the installation is complete. If you encounter any leaks, tighten the connections or apply additional plumber's putty as needed.

Delta Bathroom Faucet Repair Seats And Springs Serramar Hoa

Simple Ways To Fix A Leaky Delta Bathroom Sink Faucet

Repair Parts For One And Two Handle Delta Bathroom Faucets

How To Fix A Leaky Delta Style Bathroom Faucet

Repairing A Leaky Delta Bath Or Shower Faucet Single Lever And Setting Temp

Leaks Service Parts Faq Delta Faucet

How To Repair Leaking Dripping Delta Faucet Diyplumbing Serviceplumbing Tappplumbing

Delta Faucet Repair Parts In 2024 Bathroom

Sink Faucet Repair Delta Bathroom Drips Faucets

How To Fix Leaky Bathroom Handle Delta Faucet Model 4530 Series Hard Water
Related Posts