How to Change Bathroom Sink Mixer Tap: A Comprehensive Guide
Replacing a bathroom sink mixer tap may seem like a daunting task, but with the right tools and a bit of preparation, you can easily complete it yourself. This step-by-step guide will provide you with everything you need to know to change your bathroom sink mixer tap successfully.
Tools and Materials
Before you begin, gather the necessary tools and materials:
- New bathroom sink mixer tap
- Adjustable wrench
- Plumber's putty
- Joint sealant tape (Teflon tape)
- Bucket or basin
- Old rags
Step-by-Step Instructions
Step 1: Turn Off the Water Supply
Locate the water shutoff valves under the sink or behind the access panel in the bathroom closet. Turn both the hot and cold valves clockwise to stop the water flow.
Step 2: Disconnect the Old Tap
Place the bucket under the sink to catch any water that drains out. Use the adjustable wrench to loosen the nuts that secure the hot and cold water supply lines to the old tap. Then, remove the nuts and disconnect the supply lines.
Next, loosen the lock nut that connects the old tap to the sink. Use care not to overtighten or damage the lock nut.
Step 3: Remove the Old Tap
Once the supply lines and lock nut are loosened, lift the old tap straight up and out of the sink opening.
Step 4: Clean and Seal
Use old rags to clean the sink surface and remove any old putty or debris. Apply a thin layer of plumber's putty around the base of the new tap's mounting flange.
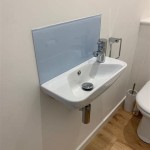
Step 5: Install the New Tap
Insert the new tap into the sink opening and align it properly. Tighten the lock nut by hand as much as possible.
Step 6: Reconnect the Supply Lines
Apply joint sealant tape to the threads of the new tap's inlet connections. Then, hand-tighten the supply lines to the appropriate inlets.
Step 7: Tighten and Seal
Use the adjustable wrench to further tighten the lock nut. Be sure not to overtighten. Finally, wrap another layer of joint sealant tape around the base of the tap where it meets the sink and tighten it with the wrench.
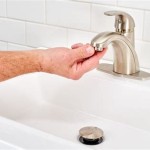
Step 8: Turn on the Water Supply and Check for Leaks
Turn on the water shutoff valves and allow water to run through the new tap. Check for any leaks at the connections. If you notice any leaks, tighten the connections further or apply additional joint sealant tape.
Tips
- If you are replacing an old-style tap with a mixer tap, you may need to purchase an adapter.
- Use a plastic or rubber cap to protect the wrench from scratching the tap.
- If you are not comfortable working with plumbing, do not hesitate to call a licensed plumber.

Single Lever Mono Basin Flow Cartridge Maintenance And Replacement

How To Easily Replace Basin Taps Step By

How To Change Bathroom Taps Everything You Need Know

Steps For How To Change A Mixer Tap Bathware Direct

How To Change A Washer On Mixer Tap Living By Homeserve

How To Install Basin Taps Replacing A Bathroom Sink Tap

Step By Guide Installing A Basin Mixer For Modern And Functional Bathroom Upgrade

How To Replace Bathroom Taps Big
Fitting A Bathroom Basin Tap The Diy

How To Install A Basin Mixer Tap Bath User Guide On Vimeo
Related Posts