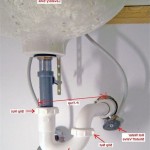
How to Repair a Leaking Delta Bathroom Faucet
A leaking bathroom faucet is not just an annoyance; it can also waste hundreds of gallons of water per year. If you have a leaking Delta bathroom faucet, there are a few things you can do to fix it yourself. Here are the steps on how to repair a leaking Delta bathroom faucet.
Identify the Source of the Leak
Before you can start repairing the leak, you need to identify where it is coming from. There are a few common places where Delta bathroom faucets can leak, including:
- The handle
- The spout
- The base of the faucet
Once you have identified the source of the leak, you can start to repair it.
Tools and Materials You'll Need
Before you start repairing the leak, you will need to gather the following tools and materials:
- Adjustable wrench
- Phillips screwdriver
- Flathead screwdriver
- Replacement parts (if necessary)
Step-by-Step Repair Instructions
Once you have gathered the necessary tools and materials, you can follow these step-by-step instructions to repair the leak in your Delta bathroom faucet:
- Turn off the water supply to the faucet. There should be two shut-off valves under the sink, one for hot water and one for cold water. Turn both valves clockwise to turn off the water.
- Remove the handle. To remove the handle, use an adjustable wrench to loosen the packing nut that is located behind the handle. Once the packing nut is loose, you can pull the handle off.
- Replace the washer. The washer is a small rubber or plastic disc that is located inside the faucet handle. Over time, the washer can become worn or damaged, which can cause the faucet to leak. To replace the washer, simply remove the old washer and replace it with a new one.
- Reinstall the handle. Once you have replaced the washer, you can reinstall the handle. To do this, simply slide the handle back onto the faucet stem and tighten the packing nut until it is snug.
- Turn on the water supply and check for leaks. Once you have replaced the washer and reinstalled the handle, you can turn on the water supply and check for leaks. If there are no leaks, then you have successfully repaired the faucet.
Tips for Preventing Future Leaks
Here are a few tips for preventing future leaks in your Delta bathroom faucet:
- Don't overtighten the packing nut. Overtightening the packing nut can damage the faucet and cause it to leak.
- Replace the washer regularly. The washer is a small part that can make a big difference in preventing leaks. It is a good idea to replace the washer every few years, or more often if you notice any leaks.
- Keep the faucet clean. Dirt and debris can build up on the faucet and cause it to leak. It is important to clean the faucet regularly to prevent leaks.

How To Repair Leaking Dripping Delta Faucet Diyplumbing Serviceplumbing Tappplumbing

How To Fix Leaky Bathroom Handle Delta Faucet Model 4530 Series Hard Water

Sink Faucet Repair Delta Bathroom Drips

How To Fix A Leaky Delta Two Handle Faucet

Simple Ways To Fix A Leaky Delta Bathroom Sink Faucet

Simple Ways To Fix A Leaky Delta Bathroom Sink Faucet

Delta Geist 8 In Widespread Double Handle Bathroom Faucet Spotshield Brushed Nickel 35864lf Sp The Home Depot

Learn How To Fix A Leaky Faucet Delta Bathroom

How To Rebuild A Delta Single Handle Faucet

Simple Ways To Fix A Leaky Delta Bathroom Sink Faucet
Related Posts
