How to Repair a Dripping Delta Bathroom Faucet
A dripping faucet is not only annoying but also wasteful, as it can waste gallons of water over time. If you have a dripping Delta bathroom faucet, there are a few things you can do to fix it yourself. Here are the steps on how to repair a dripping Delta bathroom faucet:
Step 1: Gather your tools
Before you start, you will need to gather a few tools. You will need a Phillips head screwdriver, an adjustable wrench, and a pair of pliers. You may also want to have a bucket or towel on hand to catch any water that may leak out.
Step 2: Turn off the water supply
Once you have your tools, you need to turn off the water supply to the faucet. There will be two shut-off valves under the sink, one for the hot water and one for the cold water. Turn both valves clockwise to turn off the water.
Step 3: Remove the faucet handle
Once the water is turned off, you can remove the faucet handle. On most Delta faucets, the handle is held in place by a screw. Use the Phillips head screwdriver to remove the screw and then pull the handle straight up.
Step 4: Remove the cartridge
With the handle removed, you can now remove the cartridge. The cartridge is the part of the faucet that controls the flow of water. To remove the cartridge, use the adjustable wrench to loosen the packing nut. Once the packing nut is loose, you can pull the cartridge straight out.
Step 5: Inspect the cartridge
Once you have removed the cartridge, inspect it for any damage. If the cartridge is damaged, it will need to be replaced. You can purchase a new cartridge at most hardware stores.
Step 6: Reassemble the faucet
If the cartridge is not damaged, you can reassemble the faucet. To do this, insert the cartridge back into the faucet body and tighten the packing nut. Then, replace the faucet handle and tighten the screw.
Step 7: Turn on the water supply
Once the faucet is reassembled, you can turn on the water supply. Check for any leaks and tighten any loose connections if necessary.
Step 8: Enjoy your repaired faucet
Your Delta bathroom faucet should now be repaired and leak-free. Enjoy the peace and quiet of a drip-free faucet!

How To Repair Leaking Dripping Delta Faucet Diyplumbing Serviceplumbing Tappplumbing

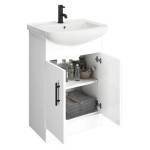
Sink Faucet Repair Delta Bathroom Drips

Simple Ways To Fix A Leaky Delta Bathroom Sink Faucet

How To Fix Leaky Bathroom Handle Delta Faucet Model 4530 Series Hard Water

Simple Ways To Fix A Leaky Delta Bathroom Sink Faucet

How To Fix A Leaky Delta Style Bathroom Faucet

Simple Ways To Fix A Leaky Delta Bathroom Sink Faucet

How To Rebuild A Delta Single Handle Faucet

Simple Ways To Fix A Leaky Delta Bathroom Sink Faucet

How To Fix A Leaky Delta Two Handle Faucet
Related Posts