How to Disassemble a Bathroom Sink Faucet
Is your bathroom sink faucet leaking or malfunctioning? Don't call a plumber just yet – you may be able to fix it yourself with a few simple steps. Disassembling a bathroom sink faucet is an easy task that can save you both time and money. Here's a step-by-step guide to help you through the process:
Step 1: Gather Your Tools
Before you begin, gather the following tools:
- Adjustable wrench
- Phillips head screwdriver
- Flat head screwdriver
- Allen wrench (if necessary)
- Cloth or towel
Step 2: Turn Off the Water Supply
Locate the water supply valves under the sink and turn them off. This will prevent water from flowing out of the faucet while you're working.
Step 3: Remove the Aerator (if applicable)
Some faucets have an aerator attached to the end of the spout. If yours does, unscrew it using your fingers or an adjustable wrench.
Step 4: Remove the Handles
Next, remove the handles from the faucet. Most handles are held in place by a set screw or a small cap. Use your Phillips head screwdriver to remove the set screw or pry off the cap with a flat head screwdriver.
Step 5: Remove the Cartridge
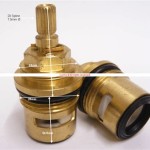
The cartridge is the part of the faucet that controls the flow of water. To remove it, use an adjustable wrench to loosen the nut that holds it in place. Once the nut is loose, you can pull the cartridge out of the faucet.
Step 6: Disconnect the Water Lines
Now, you need to disconnect the water lines that are connected to the cartridge. Use your adjustable wrench to loosen the nuts that hold the lines in place. Once the nuts are loose, you can pull the lines off of the cartridge.
Step 7: Remove the Faucet Base
The faucet base is the part of the faucet that is attached to the sink. To remove it, use your adjustable wrench to loosen the nuts that hold it in place. Once the nuts are loose, you can lift the faucet base off of the sink.
Step 8: Clean the Parts
Once you have disassembled the faucet, take some time to clean the parts with a cloth or towel. This will help to remove any dirt or debris that may have built up over time.
Step 9: Reassemble the Faucet
To reassemble the faucet, simply follow the steps in reverse order. Start by attaching the faucet base to the sink. Then, connect the water lines to the cartridge and tighten the nuts. Next, insert the cartridge into the faucet and tighten the nut that holds it in place. Finally, reattach the handles and the aerator.
Step 10: Turn on the Water Supply
Once the faucet is reassembled, turn the water supply valves back on. Check for leaks and make sure that the faucet is functioning properly.
Conclusion
Disassembling a bathroom sink faucet is a relatively simple task that can be completed in a matter of minutes. By following the steps outlined in this guide, you can save yourself both time and money by fixing the faucet yourself.

Diy How To Replace A Bathroom Sink Faucet Remove Install

How To Replace A Bathroom Faucet Home Repair Tutor

How To Remove And Install A Bathroom Faucet

How To Remove And Install A Bathroom Faucet

How To Fix A Bathroom Faucet 14 Steps

Replacing A Bathroom Faucet Fine Homebuilding

How To Remove A Bathroom Faucet

How To Remove And Install A Bathroom Faucet

How To Replace A Bathroom Faucet Tinged Blue

Diy How To Replace A Bathroom Sink Faucet Remove Install


