Delta Single Handle Bathroom Faucet Leak Repair: A Comprehensive Guide
Delta single handle bathroom faucets are renowned for their durability and performance. However, even the most reliable faucets can occasionally develop leaks, causing inconvenience and potentially leading to water damage. If you encounter a leaking Delta single handle bathroom faucet, don't panic. Repairing it is a straightforward task that most DIY enthusiasts can accomplish with the right tools and materials.
Identifying the Source of the Leak
Before attempting any repairs, it's crucial to identify the source of the leak. Here are a few common causes:
- Worn or damaged O-rings: O-rings are small rubber seals that prevent water from leaking around the handle or spout.
- Cracked or broken cartridge: The cartridge controls the flow of water through the faucet. A cracked or broken cartridge can cause leaks.
- Loose connections: The nuts and bolts that hold the faucet components together can become loose over time, leading to leaks.
Step-by-Step Repair Instructions
Once you have identified the source of the leak, follow these steps to repair it:
Replacing the O-rings
- Turn off the water supply to the faucet.
- Remove the handle by pulling it straight up.
- Unscrew the bonnet nut underneath the handle.
- Remove the cartridge by gently pulling it straight up.
- Inspect the O-rings on the cartridge for wear or damage. Replace any damaged O-rings with new ones.
- Reassemble the faucet in reverse order.
Replacing the Cartridge
- Turn off the water supply to the faucet.
- Remove the handle by pulling it straight up.
- Unscrew the bonnet nut underneath the handle.
- Pull the cartridge straight up to remove it.
- Install the new cartridge by pushing it straight down into the housing.
- Reassemble the faucet in reverse order.
Tightening Loose Connections
- Turn off the water supply to the faucet.
- Using a wrench or pliers, tighten any loose nuts or bolts around the faucet.
- Reassemble the faucet if necessary.
Preventive Maintenance
To prevent leaks from occurring in the future, consider the following preventive maintenance measures:
- Regularly check the O-rings for wear or damage and replace them as needed.
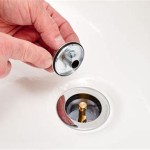
- Clean the faucet aerator to remove any mineral buildup that could cause leaks.
- Tighten any loose nuts or bolts around the faucet periodically.
By following these guidelines, you can successfully repair a leaking Delta single handle bathroom faucet and ensure its longevity and performance.

Simple Ways To Fix A Leaky Delta Bathroom Sink Faucet

How To Rebuild A Delta Single Handle Faucet

How To Repair Leaking Dripping Delta Faucet Diyplumbing Serviceplumbing Tappplumbing

Repair Parts For One And Two Handle Delta Bathroom Faucets

How To Fix Leaky Bathroom Handle Delta Faucet Model 4530 Series Hard Water

Delta Foundations 4 In Centerset Single Handle Bathroom Faucet With Metal Drain Assembly Chrome B512lf The Home Depot

Single Handle Bathroom Faucet In Stainless 538 Ssmpu Dst Delta

Delta Woodhurst Single Handle Hole Bathroom Faucet With Metal Drain Assembly In Stainless Steel 532 Ssmpu Dst The Home Depot

Delta Faucet Woodhurst Single Hole Bathroom Handle Sink Black Diamond Seal Technology Drain Assembly Matte 532 Blmpu Dst In 2024 Faucets

How To Repair A Single Handle Kitchen Faucet Diy Family Handyman