How to Remove a Single-Handle Delta Bathroom Faucet
Replacing a single-handle Delta bathroom faucet is a straightforward task that can be completed in a matter of minutes with the right tools and a little know-how. Here's a step-by-step guide to help you through the process:
Tools Required:
- Adjustable wrench
- Allen wrench (hex key)
- Phillips screwdriver
- Bucket or container for water
- Paper towels or rags
Step 1: Turn off the water supply.
Locate the shut-off valves under the sink and turn them clockwise to close them. Open the faucet to release any remaining water in the lines.
Step 2: Remove the handle.
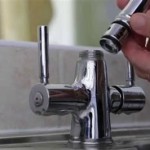
Use the Allen wrench to loosen the set screw located on the top of the handle. Pull the handle straight up to remove it.
Step 3: Disconnect the water supply lines.
Use the adjustable wrench to loosen the compression nuts that connect the water supply lines to the faucet body. Disconnect the lines and allow any remaining water to drain into the bucket.
Step 4: Loosen the mounting nut.
Use the adjustable wrench to loosen the large nut that holds the faucet in place. Do not remove the nut completely at this point.
Step 5: Lift the faucet out.
Carefully lift the faucet upwards, while supporting the water supply lines to prevent them from being damaged. Remove the faucet completely from the sink.
Step 6: Clean the sink and faucet base.
Use a damp cloth to clean the sink and the base of the faucet where the new one will be installed. Remove any old sealant or debris.
Step 7: Install the new faucet.
Place the new faucet into the sinkhole and align it properly. Tighten the mounting nut by hand as much as possible. Use the adjustable wrench to further tighten the nut, but avoid overtightening.
Step 8: Reconnect the water supply lines.
Reconnect the water supply lines to the faucet body and tighten the compression nuts with the adjustable wrench. Make sure the connections are secure but not excessively tight.
Step 9: Install the handle.
Slide the handle onto the faucet stem and tighten the set screw with the Allen wrench.
Step 10: Turn on the water supply and check for leaks.
Turn on the shut-off valves under the sink and check for any leaks around the faucet base or water supply lines. Tighten the connections as needed.
Congratulations! You have successfully replaced the single-handle Delta bathroom faucet.

How To Rebuild A Delta Single Handle Faucet

How To Repair A Delta Tub Shower Valve

Repairing A Leaky Delta Bath Or Shower Faucet Single Lever And Setting Temp

Old Delta Shower Faucet Repair Made Easy

How To Fix Leaky Bathroom Handle Delta Faucet Model 4530 Series Hard Water

Repair Parts For One And Two Handle Delta Bathroom Faucets

Fix Leaky Shower Head With A Stuck Handle

Delta Foundations 4 In Centerset Single Handle Bathroom Faucet With Metal Drain Assembly Chrome B510lf The Home Depot
Delta Single Handle Kitchen Faucet Disassembly Ifixit Repair Guide

How To Fix A Leaky Delta Style Bathroom Faucet
Related Posts


