Installing a Moen Two Handle Bathroom Faucet: A Complete Guide
Upgrading your bathroom faucet is a simple yet impactful home improvement project that can enhance both the aesthetics and functionality of your space. A Moen two handle bathroom faucet is a popular choice due to its classic design, durable construction, and ease of installation. Here's a comprehensive guide to assist you in installing your new Moen faucet with confidence.
Tools and Materials Required
Before starting the installation, gather the necessary tools and materials:
- Adjustable wrench
- Basin wrench
- Phillips head screwdriver
- Flat head screwdriver
- Plumber's putty
- Teflon tape
- New Moen two handle bathroom faucet
- Mounting hardware (included with the faucet)
Step 1: Remove the Old Faucet
Turn off the water supply lines beneath the sink and open the faucet to release any remaining water. Using an adjustable wrench, loosen the nuts that secure the water lines to the old faucet. Use the basin wrench to detach the mounting nuts that hold the faucet in place. Carefully lift the old faucet from the sink.
Step 2: Prepare the Sink
Clean the mounting surface of the sink thoroughly and apply a thin layer of plumber's putty around the drain opening. This will create a watertight seal between the faucet base and the sink.
Step 3: Install the Mounting Hardware
Attach the mounting hardware (usually a metal bracket) to the underside of the sink, ensuring it is centered over the drain opening. Tighten the screws using a Phillips head screwdriver.
Step 4: Connect the Water Lines
Wrap Teflon tape around the threaded ends of the water supply lines. Connect the blue line to the cold water valve and the red line to the hot water valve. Hand-tighten the nuts as much as possible, then use the adjustable wrench to further tighten them by about three-quarters of a turn.
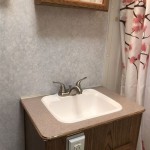
Step 5: Install the Faucet
Place the faucet body onto the mounting hardware and align the holes. Use a flat head screwdriver to tighten the hex nuts that secure the faucet to the countertop. Avoid overtightening.
Step 6: Install the Handles
Apply a small amount of plumber's grease to the base of the handles. Slide the handles onto the valve stems and press down firmly. Secure the handles with the provided set screws using a Phillips head screwdriver.
Step 7: Turn on the Water Supply
Slowly turn on the water supply lines beneath the sink and check for any leaks. If there are any leaks, tighten the connections accordingly. Open the faucet handles and allow the water to run through the lines for a few minutes to remove any debris.
Step 8: Final Adjustments
Adjust the water temperature by turning the handles clockwise or counterclockwise. Inspect the installation for proper functionality and make any necessary adjustments to the handle positions or water flow.
Tips for Success
- Use a basin wrench to avoid damaging the finish of the faucet or sink.
- Apply Teflon tape liberally to ensure watertight connections.
- Do not overtighten the faucet or handles, as this can damage the components.
- If you encounter any difficulties during installation, do not hesitate to contact a licensed plumber for assistance.
- Regular maintenance, such as cleaning and replacing seals, can extend the life of your Moen faucet.

Installation S By Moen

Moen T6905bn 9000 Voss Two Handle Faucet

Diy How To Install The Moen Boardwalk Faucet Redhead Mom

Installation S By Moen

Moen Eva 4 In Centerset 2 Handle High Arc Bathroom Faucet Chrome 6410 The Home Depot

Moen Eva 8 In Widespread 2 Handle Bathroom Faucet Trim Kit Chrome Valve Included T6420 9000 The Home Depot

Moen Lindor Spot Resist Brushed Nickel Widespread 2 Handle Watersense Bathroom Sink Faucet With Drain In The Faucets Department At Com

Moen Weylon Two Handle Chrome Centerset Bathroom Sink Faucet 84790 Com

Moen Banbury Two Handle High Arc Bathroom Faucet Com

T6222 By Moen Cia Chrome Two Handle Bathroom Faucet Studio41