How to Remove an Undermount Bathroom Sink from Marble Safely and Effectively
Removing an undermount bathroom sink from marble can be a challenging task, but it is possible with the right tools and techniques. Here's a comprehensive guide to help you safely and effectively remove the sink:
1. Safety First
Before you begin, ensure your safety and that of your work area. Wear gloves, safety glasses, and a dust mask to protect yourself from potential hazards. Cover the surrounding floor and surfaces with drop cloths to protect them from scratches and debris.
2. Disconnect Plumbing
Start by disconnecting the sink's plumbing. Turn off the water supply valves, disconnect the hot and cold water lines, and remove the drainpipe. Use a wrench to loosen the nuts and bolts, but be careful not to overtighten and damage the fittings.
3. Cut the Caulk
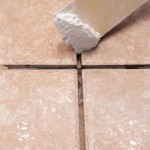
Using a sharp utility knife or a caulk cutter, carefully cut through the caulk around the sink's perimeter where it meets the marble countertop. Be precise to avoid scratching or damaging the marble. Remove any excess caulk debris.
4. Apply Heat
A heat gun or hairdryer can help soften the adhesive holding the sink in place. Direct the heat towards the underside of the sink, focusing on the edges where the adhesive is located. Be cautious not to overheat the marble, as excessive heat can damage it.
5. Use Pry Bars and Leverage
Insert flat pry bars or wedges carefully between the sink and the marble countertop. Work your way around the sink, gently prying it loose. Be patient and avoid using excessive force, as this can chip or crack the marble.
6. Remove the Sink
Once the sink is loose, carefully lift it straight up and away from the countertop. If the sink is heavy, consider using a helping hand or a suction cup lifter to assist you. Place the sink on a padded surface to avoid damage.
7. Clean the Surface
After removing the sink, thoroughly clean the marble countertop using a non-abrasive cleaner and a soft cloth. Remove any remaining adhesive residue or caulk remnants to prepare the surface for future installation.
Additional Tips:
* If the adhesive is particularly stubborn, consider using a commercial adhesive remover or a solvent specifically designed for marble. Follow the manufacturer's instructions carefully to avoid damaging the marble. * If the marble countertop has been scratched or chipped during the removal process, consult a professional stone restoration specialist for repairs. * Before installing the new sink, ensure the countertop is level and clean. Apply a thin layer of fresh caulk around the sink's perimeter to secure it in place and prevent leaks. * Allow the caulk to cure completely before using the sink. Refer to the caulk manufacturer's instructions for the recommended curing time.
How To Remove A Glued Undermount Bathroom Sink From Marble Hunker

How To Change A Bathroom Sink Undermount

How To Remove A Glued Undermount Bathroom Sink From Marble Glue

The Glue Failed On My Bathroom Sink Hometalk

Remove Over Mount Porcelain Sink

The Glue Failed On My Bathroom Sink Hometalk

How Do You Install Undermount Sinks Marble Com

Can You Replace Bathroom Sinks Without Replacing The Counter Aquarina

How To Install An Undermount Sink Fallen From The Countertop Granit Marble Steel

Undermount Bathroom Sink Buyer S Guide The Family Handyman
Related Posts


