Replacing Your Bathroom Vanity Sink: A Step-by-Step Guide
Upgrading your bathroom vanity sink can significantly enhance the aesthetics and functionality of your bathroom. Whether you're replacing a worn-out sink or simply want to update the look, this guide will take you through the essential steps involved in the process.
Step 1: Safety First
Before you begin, ensure safety by turning off the water supply to the sink. This is usually done by shutting off the main water supply valve or, if there is one, the shut-off valves under the sink.
Step 2: Disconnect and Remove the Old Sink
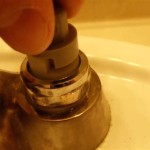
Detach the water supply lines from the faucet by loosening the nuts using a wrench. Then, disconnect the drain line by unscrewing the nuts that hold it in place. Once disconnected, lift the old sink out of the vanity.
Step 3: Prepare the New Sink
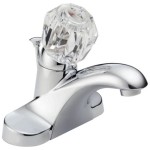
Assemble and install the new faucet according to the manufacturer's instructions. Apply a bead of plumber's putty around the rim of the drain hole on the underside of the sink. This will create a watertight seal when the sink is installed.
Step 4: Set and Secure the New Sink
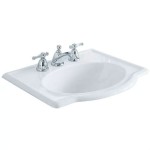
Carefully place the new sink into the vanity opening. Push down gently to seat it properly and ensure it is level. Tighten the mounting brackets or nuts that secure the sink to the vanity.
Step 5: Reconnect the Plumbing
Screw the water supply lines into the faucet and hand-tighten them. Use a wrench to further tighten them by about a quarter turn, being careful not to overtighten. Connect the drain line to the drain hole and tighten the nuts securely.
Step 6: Inspect and Finish Up
Turn on the water supply and check for leaks around the faucet, drain, and water supply lines. If any leaks are present, tighten the connections further. Apply caulk around the edges of the sink where it meets the vanity to prevent water damage and give a finished look.
Additional Tips
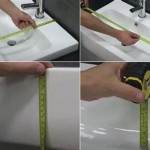
Measure Twice, Cut Once: Before purchasing a new sink, measure the vanity opening to ensure it will fit properly.
Use the Right Tools: A basin wrench is essential for tightening nuts in tight spaces. Always use appropriate wrenches and avoid using excessive force.
Avoid Overtightening: Overtightening nuts can damage plumbing fixtures and cause leaks.
If in Doubt, Call a Plumber: If you encounter any difficulties or are unsure about any aspect of the replacement process, don't hesitate to contact a qualified plumber for assistance.

How To Install A Bathroom Vanity And Sink

How To Install A Bathroom Vanity
:max_bytes(150000):strip_icc()/7_remove-vanity-top-56a4a26d3df78cf772835b2d.jpg?strip=all "How To Remove A Bathroom Vanity Cabinet")
How To Remove A Bathroom Vanity Cabinet
:max_bytes(150000):strip_icc()/8_remove-sink-base-cabinet-56a4a26d3df78cf772835b30.jpg?strip=all "How To Remove A Bathroom Vanity Cabinet")
How To Remove A Bathroom Vanity Cabinet

How To Remove A Bathroom Vanity Budget Dumpster


How To Replace A Bathroom Vanity The Handyman


How To Install Or Remove A Bathroom Vanity Homeserve Usa
Related Posts