How to Attach a Bathroom Sink Vanity: A Comprehensive Guide
Transforming your bathroom's aesthetic with a new vanity can be a rewarding experience. However, ensuring it is securely attached is crucial for both functionality and safety. Follow this comprehensive guide to learn the essential steps for attaching a bathroom sink vanity with precision.
1. Gather Necessary Tools and Materials
Before starting, assemble the following tools and materials:
- Tape measure or ruler
- Level
- Screwdriver or cordless drill
- Screws and anchors (if necessary)
- Plumber's putty or silicone sealant
- Wrench
- Pliers
2. Determine Placement and Mark Holes
Measure and mark the placement of the vanity using a tape measure or ruler. Use a level to ensure it is level. Hold the vanity against the wall and align it with the marks. Mark the screw holes through the pre-drilled holes on the vanity back.
3. Install Wall Anchors (Optional)
If the wall material is drywall, you may need to install wall anchors for additional support. Use a drill bit to create pilot holes where marked and insert the anchors. Ensure they are flush with the wall.
4. Secure the Vanity to the Wall
Align the vanity with the marked holes and lift it into place. Carefully drive screws through the holes and into the anchors or studs, depending on your wall type. Ensure the screws are tight but avoid overtightening.
5. Level and Adjust
Once secured, use a level to ensure the vanity is level front to back and side to side. Adjust the screws or shims underneath the vanity as necessary to achieve a level position.
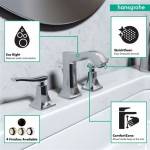
6. Install the Sink
Apply plumber's putty or silicone sealant around the drain opening on the sink. Place the sink in the countertop opening and align the drain hole with the drain opening. Carefully tighten the nuts on the underside of the sink to secure it.
7. Connect Plumbing Fixtures
Connect the water supply lines to the sink using wrenches and pliers. Tighten the connections securely but do not overtighten. Attach the drain pipe to the sink trap and connect it to the drain in the wall.
8. Check for Leaks
Turn on the water supply and check for leaks around the sink, drain, and plumbing connections. Tighten any loose connections as necessary. Allow the water to run for a few minutes to ensure there are no leaks.
9. Seal the Vanity
Apply a bead of caulk around the perimeter of the vanity where it meets the wall and backsplash. Smooth the caulk with a wet finger or caulking tool to create a watertight seal.
Congratulations!
Your bathroom sink vanity is now securely attached and ready to use. Remember to follow these steps carefully and ensure proper alignment and sealing to prevent potential damage or leaks.

How To Install A Bathroom Vanity

How To Install A Bathroom Vanity

12 Easy Steps To Install Bathroom Vanity And Sink

How To Install Or Remove A Bathroom Vanity Homeserve Usa


The 9 Steps For Installing A Bathroom Vanity Ryan Old Plumbing

Tutorial How To Install A Bathroom Vanity The Diy Playbook

How To Install A Vanity Forbes Home

Replace Vanity Top And Faucet Diy Network

Bathroom Vanity Installation Tips Newsnews