How to Change a Washer on a Bathroom Sink Tap
Is your bathroom sink tap dripping? A worn-out washer is usually the culprit. Replacing a washer is a simple plumbing task that you can easily do yourself. Here's a step-by-step guide to help you through the process.
Tools and Materials You'll Need:
- Replacement washer (matching the size of your tap)
- Adjustable wrench
- Basin wrench or pliers
- Cloth or rag
- Small bucket or bowl
Step-by-Step Instructions:
- Turn Off the Water Supply: Locate the water shut-off valves under the sink. Turn both the hot and cold valves clockwise to shut off the water supply.
- Open the Tap: Turn on the sink tap to release any remaining water in the line.
- Remove the Aerator or Sprayer: If your tap has an aerator or sprayer, use a wrench or pliers to unscrew it.
- Loosen the Packing Nut: Using an adjustable wrench, loosen the packing nut, which is located just below the handle. Do not remove it completely.
- Remove the Handle: Pull the handle straight up to remove it.
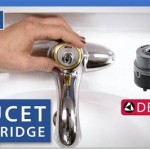
- Remove the Stem Assembly: Using the basin wrench or pliers, grasp the stem assembly, which is the part that connects the handle to the tap body. Turn it counterclockwise to loosen and remove it.
- Remove the Old Washer: Use a cloth or rag to gently remove the old washer from the stem assembly.
- Install the New Washer: Place the new washer on the stem assembly, ensuring that it is facing the correct direction (usually marked with an "up" arrow).
- Reassemble the Tap: Insert the stem assembly back into the tap body and tighten it using the basin wrench or pliers. Tighten the packing nut by hand, then use the adjustable wrench to further tighten it.
- Reattach the Handle: Push the handle back onto the stem assembly and tighten it.
- Turn On the Water Supply: Open the shut-off valves under the sink to restore the water supply.
- Check for Leaks: Turn on the tap and check for any leaks. If there are any, further tighten the packing nut.
Tips:
* If the washer is stuck, try gently prying it off with a flat-head screwdriver or needle-nose pliers. * If the tap still leaks after replacing the washer, it may have other problems, such as a worn-out O-ring or a damaged stem assembly. In this case, you may need to call a plumber. * If you are not comfortable performing this task, do not hesitate to contact a professional plumber for assistance.
How To Change A Washer On Mixer Tap Living By Homeserve

How To Replace A Tap Washer

How To Change Bathroom Taps Everything You Need Know

Learn The 7 Diy Steps To Replace Your Tap Washer Blog

Leaking Tap Learn How To Change A Washer

How To Change A Tap Washer Warehouse

How To Change A Washer On Mixer Tap Bathroom Ideas

Your Guide To Replacing Tap Washers Qs Supplies

How To Change A Tap Washer

How To Easily Replace Basin Taps Step By