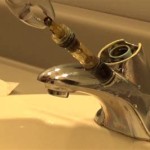
How to Effortlessly Put Drain Back in Bathroom Sink
A loose or missing drain in a bathroom sink can be an annoying and inconvenient issue. However, it's a relatively simple problem that you can easily fix yourself with just a few tools and a bit of know-how. Here's a comprehensive guide on how to put a drain back in a bathroom sink.
Tools and Materials
- Pliers
- Adjustable wrench
- Drain stopper assembly
- Putty knife (optional)
- Plumber's putty (optional)
- Rag
Step 1: Remove the Old Drain Stopper
If there is an existing drain stopper, start by removing it. Place a rag over the drain to prevent debris from falling into the drainpipe. Use pliers to grip the drain stopper and turn it counterclockwise to loosen it. Once it's loose, pull it up and out of the sink.
Step 2: Clean the Drain Hole
Once the drain stopper is removed, inspect the drain hole for any debris or old putty. Use a putty knife to scrape away any remnants of putty or sealant. Wipe the drain hole and surrounding area clean with a damp rag.
Step 3: Inspect the Drain Stopper Assembly
Examine the new drain stopper assembly, which typically consists of three components: the flange, the stopper, and the rubber washer. Ensure that all the components are present and undamaged.
Step 4: Apply Plumber's Putty (Optional)
If your drain stopper assembly has a flange, you may want to apply a ring of plumber's putty around the flange. This will help to create a watertight seal. Roll out a small piece of putty and shape it into a ring. Place the putty ring on the flange, ensuring that it is evenly distributed.
Step 5: Insert the Drain Stopper Assembly
Insert the drain stopper assembly into the drain hole. Insert the flange first, followed by the stopper. Ensure that the rubber washer is properly seated between the flange and the sink.
Step 6: Tighten the Drain Stopper
Place a rag over the stopper to protect it from scratches. Use pliers or an adjustable wrench to tighten the drain stopper. Turn the stopper clockwise to secure it in place. Avoid overtightening, as this could damage the drain stopper or sink.
Step 7: Test the Drain
Turn on the water and check for leaks. If there are any leaks, tighten the drain stopper further. Once you're satisfied that the drain is watertight, you can remove the rag and discard the old drain stopper.
By following these steps, you can easily put a drain back in a bathroom sink and restore it to proper working order. If you encounter any difficulties or have any concerns, don't hesitate to consult with a qualified plumber.

How To Fix A Bathroom Sink Drain Stopper 4 Easy Solutions

How To Replace A Sink Stopper Quick And Simple Home Repair

How To Fix Or Maintain Your Sink S Pop Up Mechanism
How To Install Bathroom Sink Drain Queen Bee Of Honey Dos

How To Replace Or Maintain A Sink Pop Up Drain Assembly
Install A Drain Stopper So The Is Removable
I Closed My Sink Drain Stopper And Now It Won T Open Again Is There Any Way That Can Repair This Without Hiring A Plumber Quora

How To Replace A Bathroom Sink Drain Assembly

How To Unclog A Bathroom Sink Hana S Happy Home

How To Clear A Clogged Drain Reviews By Wirecutter
Related Posts


