How to Install a Bathroom Bowl Sink: A Detailed Guide
Installing a bathroom bowl sink is a relatively simple plumbing task that can be completed in a few hours with the right tools and materials. By following this step-by-step guide, you can ensure a successful installation that will provide years of reliable use.
Materials Needed:
* New bathroom bowl sink * Sink drain * Basin wrench * Adjustable wrench * Plumber's putty * Silicone caulkTools Needed:
* Screwdriver * Hammer * Level * HacksawStep 1: Prepare the Sink Hole
* Remove the old sink by unscrewing the drain pipe and nuts securing the sink to the countertop. * Clean the sink hole and surrounding area thoroughly to remove any debris or residue. * Apply a bead of plumber's putty around the rim of the sinkhole, smoothing it out evenly.Step 2: Install the Sink
* Position the new sink over the sinkhole, ensuring it is aligned correctly. * Carefully lower the sink into place, pressing down gently to seat it on the putty. * Use the basin wrench to tighten the nuts underneath the sink, securing it to the countertop.Step 3: Install the Drain
* Place the drain strainer over the drain hole and tighten it into place using the adjustable wrench. * Apply a bead of silicone caulk around the base of the drain strainer to create a watertight seal.Step 4: Connect the Drain Pipe
* Cut the drain pipe to the appropriate length using a hacksaw. * Insert the drain pipe into the drain strainer and secure it with the nut provided. * Tighten the nut using the adjustable wrench, ensuring a snug connection.Step 5: Level and Caulk
* Use a level to ensure the sink is level in both directions. Adjust the nuts underneath the sink as needed. * Apply a bead of silicone caulk around the joint between the sink and the countertop. * Smooth out the caulk using your finger or a caulking tool.Step 6: Install the Faucet
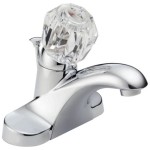
* Follow the manufacturer's instructions to install the faucet on the sink.Step 7: Final Inspection
* Turn on the water supply and check for any leaks around the sink, drain, and faucet. * If any leaks are present, tighten the connections accordingly.Tips:
* Measure the existing sink hole and purchase a new sink that is the same size or slightly smaller. * Use a generous amount of plumber's putty to create a watertight seal. * Allow the caulk to cure completely before using the sink. * If you are replacing a sink with a different type of material, you may need to adjust the countertop opening.
How To Fit A Bathroom Sink Diy Guides Victorian Plumbing

Bathroom Sink Plumbing Installation

How To Install A Vessel Sink

How To Install A Vessel Sink Faucet

How To Install A Vessel Sink Faucet

How To Install A Vessel Sink Step By Instructions

How To Replace And Install A Bathroom Sink

How To Install A Vessel Sink

How To Install A Vessel Sink Faucet

Bathroom Sink Guide Lowe S
Related Posts