How to Rough-In Plumbing for a Bathroom
Roughing-in plumbing for a bathroom involves installing the necessary pipes and drains to connect fixtures like sinks, toilets, and showers. This process is essential for ensuring that your bathroom has proper water supply and drainage.
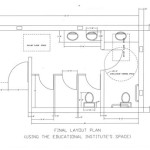
Before starting, it's crucial to have a clear layout of your bathroom fixtures and the location of the main water supply and drain lines. This will guide your piping installation.
Here are the essential steps for roughing-in plumbing for a bathroom:
Step 1: Install the Main Water Shut-Off Valve
Locate the main water supply line and install a shut-off valve. This valve will allow you to turn off the water to your bathroom for repairs or maintenance.
Step 2: Run Hot and Cold Water Lines
From the shut-off valve, run hot and cold water lines to each fixture location. Use flexible PEX tubing or copper pipes for this purpose.
Step 3: Install Drain Lines
Run drain lines from each fixture to the main drain stack. Use PVC or ABS pipes for drains and ensure proper slope to allow water to flow smoothly.
Step 4: Install Fixture Rough-Ins
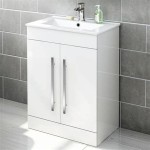
Install rough-ins for each fixture, including sink drain assemblies, toilet flanges, and shower valves. These rough-ins will provide a location for fixtures to be connected later.
Step 5: Test the System
Once all the piping is installed, temporarily connect water supply and drain lines to each fixture. Turn on the water supply and check for any leaks. Address any issues before proceeding.
Additional Tips:
- Use proper fittings and seals to prevent leaks.
- Support pipes securely to prevent movement and damage.
- Consider future bathroom upgrades when planning your rough-in.
- If you encounter any difficulties, consult a licensed plumber for assistance.
Roughing-in plumbing for a bathroom requires precision and attention to detail. By following these steps and considering the additional tips, you can ensure a well-functioning plumbing system for your bathroom.

How To Do A Plumbing Rough In Pro Tool Reviews

Plumbing Rough In Slab Diagrams Diagram Under Sink Shower Drain

Plumbing In The Downstairs Bathroom Blog Homeandawaywithlisa

Proper Ways To Relocate Plumbing When Renovating A Bathroom Kevin Szabo Jr Services Local Plumber Tinley Park Il

What Does A Bathroom Plumbing Diagram For Rough In Look Like Quora

How To Plumb A Basement Bathroom Diy Family Handyman

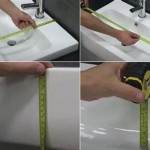
Rough In Plumbing Bathroom Dimensions Jim The Home Guy

Plumbing In The Walls

Basement Bathroom Plumbing Planning For A Below Grade Lavatory

Rough In Plumbing Vs Finish Kulk S Heating Inc
Related Posts