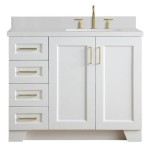
Essential Aspects of Bathroom Cabinet Makeovers
Understanding the core aspects of renewing bathroom cabinets is vital for creating a stunning and functional space. This article delves into the crucial elements that contribute to a successful bathroom cabinet makeover.Preparation: The Foundation for Success
Thorough preparation is essential before commencing any makeover project. Start by clearing the cabinets to assess their condition. Remove hardware and hinges carefully. Cleaning the cabinets with a degreasing solution ensures proper adhesion of new finishes.
Painting or Staining: A Fresh Canvas
Painting or staining the cabinet doors and frames is a transformative step. Select high-quality paint or stain to achieve a durable and esthétique finish. Prepare the surfaces by sanding, priming, and ensuring a smooth base. Apply ample coats of paint or stain, allowing sufficient drying time between each application.
Updating Hardware: Enhancing Functionality
Hardware can significantly impact the overall aesthetic and functionality of the cabinets. Replace old handles and knobs with stylish and durable options. Consider the size, shape, and material that complements the new cabinet finish. Ensure the hardware is screwed in securely for optimal use.
Adding Decorative Trim: A Touch of Elegance
Adding decorative trim, such as molding or beadboard, can elevate the appearance of bathroom cabinets. Trim can be painted or stained to match the cabinets or create a contrasting accent. It helps define cabinet sections, adds depth, and enhances the overall design.
Upgraded Shelving: Maximizing Storage
Optimized shelving can revolutionize storage capacity and accessibility. Consider installing pull-out drawers, adjustable shelves, or corner shelves to maximize space utilization. Choose durable and easy-to-clean materials that complement the cabinet's new aesthetics.
Integrating Lighting: Illuminating Style
Adequate lighting is crucial for optimal functionality and enhancing the ambiance of the bathroom. Install under-cabinet lighting to illuminate the countertop and create a warm, inviting atmosphere. Consider recessed lighting or sconces to provide ambient lighting throughout the space.
Finishing Touches: The Final Flourish
The final touches complete the makeover and add personal touches. Add a fresh coat of caulk around the edges of the cabinets and countertops to create a seamless finish. Place mats or trays inside drawers to protect surfaces and provide a touch of style. Display bathroom essentials in decorative containers or baskets to add a cohesive and functional element.
With careful planning and attention to these essential aspects, transforming bathroom cabinets into stunning and practical fixtures is an attainable goal. Embark on this project with confidence, knowing that you possess the knowledge to create a bathroom space that exceeds expectations.

Easy Diy Bathroom Vanity Makeover Midwest Life And Style Blog

Diy Easy Bathroom Makeover Transformation Faux Marble Framed Mirror No Paint The Ann

25 Budget Friendly Diy Bathroom Vanity Makeovers

Diy Bathroom Vanity Makeover Tylynn M

Bathroom Makeover Day 5 The Finished Vanity Before After Addicted 2 Decorating

Bathroom Vanity Makeover Decor Adventures

Diy Bathroom Vanity Makeover With Behr Grey Paint

Bathroom Vanity Makeover Easy Diy Home Paint Project Mom Endeavors

How To Completely Change Bathroom Cabinets With Paint Roots Wings Furniture Llc

Chalk Painted Bathroom Vanity Makeover Our Storied Home
Related Posts
