How to Run Water Lines for a Bathroom
Installing new water lines for a bathroom is a complex plumbing job that requires careful planning and execution. By following these steps, you can ensure that your water lines are installed correctly and safely.
1. Plan the Layout
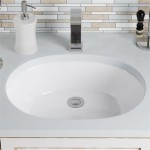
Before starting any work, it is important to plan the layout of your water lines. This includes determining the location of all fixtures (sink, toilet, shower, etc.), as well as the size and type of pipe that will be used.
2. Gather Your Materials
Once you have planned the layout, you will need to gather the necessary materials. This includes:
*3. Cut and Install the Pipe
Once you have all of your materials, you can begin cutting and installing the pipe. If you are using copper pipe, you will need to solder the fittings together. If you are using PEX pipe, you will need to use a crimping tool to attach the fittings.
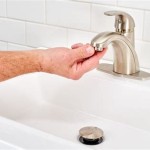
4. Connect the Fixtures
Once the pipe is installed, you can connect the fixtures. This involves attaching the water supply lines to the fixtures and then turning on the water to check for leaks.
5. Test the System
Once the fixtures are connected, you should test the system to make sure that it is working properly. This involves running water through all of the fixtures and checking for leaks.
Tips:
- Always turn off the water supply before starting any work.
- Use a level to ensure that the pipe is installed level.
- Be careful not to overtighten the fittings.
- If you are not sure how to do a particular task, consult a professional plumber.

How To Finish A Basement Bathroom Pex Plumbing

Three Designs For Pex Plumbing Systems Fine Homebuilding

Running Pex Water Lines For The Bathroom And Shower

Adding A Bathroom To Home Cold Water Lines In Installation

Help Water Running To Tub Spout And Shower Head Simultaneously Plumbing Diy Installation
:strip_icc()/SCP_173_04-a5f887244add47e48d7a24d0579341d7.jpg?strip=all "The Ultimate Guide To Bathroom Plumbing Diagrams And Layouts")
The Ultimate Guide To Bathroom Plumbing Diagrams And Layouts

How To Install Shower Plumbing Mt Drains

Plumbing In The Walls

5 Ways To Plumb A Bathroom Wikihow

Plumbing In The Walls
Related Posts