DIY Bathroom Remodel: A Comprehensive Guide
Embarking on a bathroom remodel can be a daunting task, but it can also be a rewarding experience, allowing you to transform this essential space into your personal sanctuary. While hiring a professional contractor may be the preferred choice for major renovations, many homeowners opt for a DIY approach for smaller-scale projects or to save on labor costs. This guide provides a comprehensive overview of the DIY bathroom remodel process, covering key considerations, essential steps, and valuable tips to ensure a successful transformation.
1. Planning and Preparation
The foundation of any successful DIY project lies in meticulous planning and preparation. This phase involves defining your project scope, setting a budget, gathering inspiration, and making necessary measurements.
- Define Project Scope: Determine the specific aspects of your bathroom you wish to remodel, such as replacing fixtures, updating tile, or installing a new vanity. A well-defined scope helps you prioritize tasks and allocate resources effectively.
- Set a Realistic Budget: Carefully estimate the cost of materials, tools, and any potential permits. Factor in unexpected expenses and contingencies. Consider using online calculators or consulting with local home improvement stores for accurate cost estimations.
- Gather Inspiration: Browse online platforms, magazines, and design books for bathroom remodel ideas. Create a mood board or inspiration folder to visualize your desired style, colors, and materials. This step helps you refine your vision and make informed decisions.
- Measure and Sketch: Accurate measurements of your bathroom are essential for ordering materials and planning the layout. Create a detailed sketch or use a dedicated room planning software to visualize the new design and ensure all elements fit within the space.
Once you have a clear plan and a realistic budget, you can begin the process of obtaining necessary permits, if required, and gathering the essential tools and materials.
2. Essential Tools and Materials
A well-equipped toolbox is crucial for a DIY bathroom remodel. Gather the following essential tools and materials beforehand to avoid delays and frustration:
- Power Tools: A drill, circular saw, jigsaw, and reciprocating saw are essential for cutting, drilling, and removing materials.
- Hand Tools: A tape measure, level, utility knife, pliers, screwdrivers, hammers, and wrenches are indispensable for various tasks.
- Safety Equipment: Safety goggles, gloves, ear protection, and a respirator are crucial for protecting your health and ensuring a safe work environment.
- Materials: Based on your project scope, acquire materials such as tiles, grout, bathroom fixtures, paint, cabinets, countertops, and plumbing supplies.
Always prioritize safety and invest in high-quality tools and materials to ensure a successful and durable remodel.
3. Demolishing and Removal
The next step involves demolishing existing fixtures and materials according to your design plan. This process requires careful planning and execution, ensuring proper safety precautions and waste disposal.
- Disconnecting Utilities: Before demolishing any fixtures, disconnect electricity, water, and gas supplies. This safety measure is crucial to prevent accidents or injury.
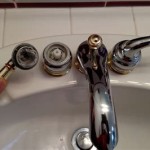
- Removing Fixtures: Carefully remove old fixtures, such as the toilet, sink, bathtub, or shower. Note the location of plumbing and electrical connections for future reference.
- Demolishing Walls and Flooring: If your project involves removing walls or flooring, proceed with caution. Use a reciprocating saw or demolition hammer to remove existing materials carefully. Ensure proper ventilation and wear appropriate safety gear.
- Proper Waste Disposal: Dispose of demolition debris responsibly. Check local regulations for disposal guidelines and consider recycling or donating reusable materials.
This stage can be messy and requires careful planning and execution. Remember to prioritize safety and work in a well-ventilated area.
4. Installing New Fixtures and Finishes
The installation of new fixtures and finishes is a crucial phase that requires patience, attention to detail, and adherence to manufacturers' guidelines.
- Installing Plumbing and Electrical: Connect new fixtures and appliances to the existing plumbing and electrical systems. Ensure proper sealing, insulation, and grounding for safety. Consult with a licensed professional if you are unfamiliar with plumbing and electrical work.
- Installing Tile and Grout: Laying tile requires precision and skill. Prepare the subfloor, apply mortar, and install tiles carefully. Allow adequate curing time before applying grout.
- Installing Cabinets and Countertops: Assemble cabinets and countertops according to manufacturer instructions. Ensure proper alignment and secure installation using appropriate fasteners.
- Painting and Finishing Touches: Apply paint, wallpaper, or other finishes to walls, ceilings, and trim. Allow adequate drying time before installing fixtures and accessories.
Each installation step has specific requirements and best practices. Refer to manufacturer instructions, online tutorials, and professional guidance for best results.
5. Finishing Touches and Cleaning
The final stage involves adding finishing touches and cleaning up the workspace. This allows you to enjoy your newly transformed bathroom in its full glory.
- Installing Accessories: Install towel bars, showerheads, mirrors, and other bathroom accessories according to your preferences.
- Cleaning and Sealing: Thoroughly clean the bathroom to remove dust, debris, and excess grout. Seal grout and countertops to protect them from stains and moisture.
- Testing Fixtures: Test all plumbing and electrical fixtures to ensure they operate correctly. Address any issues promptly.
- Decoration and Personalization: Add personal touches through decorative accessories, towels, and rugs. Arrange items to create a functional and visually appealing space.
These final steps complete your DIY bathroom remodel, allowing you to enjoy a fresh and personalized space. Remember to maintain regular cleaning and upkeep for a lasting transformation.

Bathroom Remodeling A Step By Guide Budget Dumpster

Bathroom Remodeling A Step By Guide Budget Dumpster

250 Diy Bathroom Remodel On A Budget Grace In My Space

Bathroom Remodeling A Step By Guide Budget Dumpster

Easy Small Bathroom Remodel Diy Makeover

Things To Consider Before Doing A Diy Bathroom Remodel Truhome Inc

Diy Bathroom Remodel On A Budget And Thoughts Renovating In Phases Small

Small Bathroom Ideas To Make Your Efficient

An 8k Bathroom Reno For Under 4k By Doing It Ourselves Interior Frugalista

Diy Bathroom Remodel How Much Did It Cost
Related Posts


