Essential Guide: Removing Tile from Bathroom Walls
Remodeling a bathroom can be an exciting project, but it can also involve some complex tasks like removing old tiles from the walls. Whether you're a DIY enthusiast or prefer professional assistance, understanding the key aspects of tile removal is crucial for a successful outcome.
1. Preparation: Safety First
Before starting, prioritize safety by wearing appropriate protective gear including gloves, safety glasses, and a face mask to prevent exposure to dust and debris. Clear the bathroom of any obstacles and ensure proper ventilation by opening windows or using a fan.
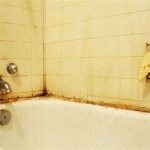
2. Assessing the Situation
Determine the type of tile and adhesive used to install it. This knowledge helps in choosing the right tools and techniques for effective removal. If you're unsure, consult a professional or refer to the original installation documentation.
3. Gather the Essential Tools
Your tile removal arsenal should include a hammer or rubber mallet, a chisel or pry bar, a utility knife or grout saw, a bucket for debris, and a scraper. Opt for tools that are sharp and well-maintained for optimal efficiency.
4. Removing Grout
Start by removing the grout between the tiles. Use a grout saw or utility knife to carefully cut along the grout lines. Apply force gradually to avoid damaging the tiles or underlying surfaces.
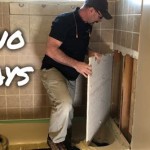
5. Chiseling and Prying
Insert the chisel or pry bar into the space created by removing the grout. Gently tap the hammer or mallet to loosen the tile's grip on the wall. Use slow, steady strokes to prevent breakage or damage.
6. Removing the Tiles
Once loosened, use the pry bar to carefully remove each tile. Start from a corner and work your way inward. Avoid applying excessive force that could gouge the wall surface. Place the removed tiles in the bucket for disposal.
7. Cleaning the Surface
Once all the tiles are removed, it's time to clean the wall surface. Use a scraper to remove any remaining adhesive or grout. Wipe the surface clean with a damp cloth to remove dust and debris.
8. Professional Assistance
If the tile removal process proves too challenging or time-consuming, consider seeking professional assistance from a qualified contractor. They possess the expertise, experience, and specialized tools to ensure safe and efficient tile removal.
Conclusion
Removing tile from bathroom walls requires careful preparation, the right tools, and a methodical approach. By following these essential steps, you can successfully complete the task on your own or make informed decisions when considering professional help. Remember, safety is paramount, and a clean, smooth surface is the foundation for a successful bathroom remodel.

Easy Diy Guide On Removing Tiles From Walls Fantastic Handyman Au

The Best Way To Remove Old Shower Tile

Edited Removing Tile From Bathroom Walls Hometalk

How To Remove A Tile Backsplash Homeserve Usa

How To Remove Wall Tiles

Tile Removal How To Remove From Wall

Preparing Walls For Tiling Removing Old Tiles Bathroom Guru

How Do I Remove The Adhesive From 1950 S Pink Wall Tiles Bathroom Tile Removing

How To Remove Old Tiles A Step By Guide Walls And Floors

Diy Half Bathroom Demolition The Handyman S Daughter