The Essential Guide to Replacement Bathroom Sink Traps
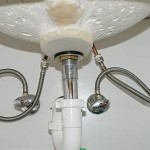
A bathroom sink trap, also known as a P-trap or U-trap, is an essential component of your bathroom plumbing system. Its primary function is to prevent sewer gases from escaping into your bathroom and to create a water seal that traps debris from clogging your drain. Over time, sink traps can become damaged, corroded, or clogged, making it necessary to replace them.
Replacing a bathroom sink trap is a relatively straightforward task that can be completed in under an hour, even for DIY enthusiasts. However, it's important to understand the essential aspects of this replacement process to ensure proper installation and functionality.
Types of Sink Traps
There are two main types of sink traps: P-traps and U-traps.
- P-traps: P-traps are the most common type of sink trap and resemble the letter "P." They are typically made of plastic or metal and are easy to install.
- U-traps: U-traps are less common and resemble the letter "U." They are usually made of metal and are often used in older homes or commercial buildings.
Choosing the Right Sink Trap
When selecting a replacement sink trap, consider the following factors:
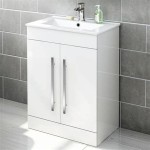
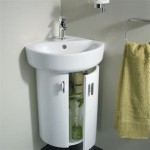
- Sink type: Choose a trap that is compatible with your specific sink type (e.g., standard, vessel, or pedestal sink).
- Material: Sink traps are typically made of plastic, metal, or stainless steel. Plastic traps are lightweight and inexpensive, while metal and stainless steel traps are more durable and resistant to corrosion.
- Size: Sink traps come in various sizes, so measure the existing trap or consult the sink manufacturer's specifications to determine the correct size for your replacement.
- Finish: Sink traps are available in a variety of finishes, including chrome, brass, and brushed nickel. Choose a finish that complements your bathroom decor.
Tools and Materials Required
To replace a bathroom sink trap, you will need the following tools and materials:
- Replacement sink trap
- Wrench
- Plumber's putty
- Bucket or drain plug
- Cloth or sponge
Replacement Procedure
Step 1: Prepare the Work Area
Place a bucket or drain plug in the sink to prevent debris from entering the drain.
Step 2: Disconnect the Trap
Using a wrench, loosen the nuts that connect the trap to the sink drain and tailpiece.
Step 3: Remove the Old Trap
Carefully lift the old trap out of place.
Step 4: Clean the Connection Surfaces
Clean the connection surfaces on the sink drain and tailpiece using a cloth or sponge.
Step 5: Apply Plumber's Putty
Apply a thin layer of plumber's putty to the threads of the tailpiece.
Step 6: Install the New Trap
Place the new trap onto the tailpiece and tighten the nuts using a wrench.
Step 7: Connect the Drain
Connect the sink drain to the trap.
Step 8: Test the Trap
Fill the sink with water and check for any leaks. If there are leaks, tighten the nuts further.
Conclusion
Replacing a bathroom sink trap is a simple and effective way to maintain a functional and hygienic plumbing system. By following the essential aspects outlined in this guide, you can ensure a successful replacement and prevent future plumbing issues.

How To Install Bathroom Sink Drain Queen Bee Of Honey Dos

How To Fix Or Replace A Leaky Sink Trap Hometips Drain Repair Under Plumbing

Bathroom Sink Plumbing Installation Diy Montreal

Bathroom Sink Plumbing Installation Diy Montreal

Easy Ways To Fix A Leaky Sink Trap 12 Steps With Pictures

Replace A Trap And Add Cleanout Fine Homebuilding

Keeney 1 4 In Push On Bathroom Sink Drain With Overflow Brushed Nickel K820 75bn The Home Depot

How To Install Bathroom Sink Drain Queen Bee Of Honey Dos

How To Replace A Drain In The Bathroom Sink Right Way

Snappytrap Universal Drain Kit For Bathroom Sinks Dk 105 The Home Depot
Related Posts