Replace 3 Hole Bathroom Faucet: Essential Aspects
Replacing a 3 hole bathroom faucet requires meticulous attention to essential aspects that ensure a successful installation. Understanding these key elements is crucial for completing the task effectively and achieving a functional and aesthetically pleasing result.
This article will delve into the essential aspects of replacing a 3 hole bathroom faucet, providing detailed insights into each element. As we explore these aspects, we will keep in mind the part of speech of the keyword "Replace," which is a verb. This will help us focus on the actions and procedures involved in the replacement process.
### Essential Aspects: #### 1. Preparation and Safety PrecautionsBefore beginning the replacement process, it is essential to prepare the bathroom and take appropriate safety precautions to prevent any accidents. This includes clearing the work area, turning off the water supply, and wearing protective gear like gloves and safety glasses.
#### 2. Choosing the Right Replacement FaucetSelecting the ideal replacement faucet is crucial for both functionality and aesthetics. Consider factors such as the number of holes required, the flow rate, and the desired design style. Ensure compatibility with your existing sink and plumbing system.
#### 3. Tools and MaterialsGather the necessary tools and materials before starting the replacement. This includes a basin wrench, adjustable wrench, plumber's putty, Teflon tape, and any additional parts or materials specific to the chosen faucet.
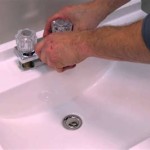
#### 4. Removal of the Old FaucetTo remove the old faucet, use a basin wrench to loosen the nuts securing it to the sink. Disconnect the water supply lines and carefully remove the faucet from the sink.
#### 5. Preparing the SinkBefore installing the new faucet, clean the sink surface and apply plumber's putty around the faucet holes. This will create a watertight seal and prevent leaks.
#### 6. Installation of the New FaucetPlace the new faucet into the sink holes and secure it with the mounting nuts. Tighten the nuts using an adjustable wrench, ensuring a snug fit without overtightening. Reconnect the water supply lines.
#### 7. Testing and AdjustmentsOnce the faucet is installed, turn on the water supply and check for any leaks. Adjust the faucet as needed to ensure proper flow and temperature control.
#### 8. Cleaning and Final TouchesWipe away any excess plumber's putty or water stains from the sink and faucet. Add any trim or decorative elements as per the faucet manufacturer's instructions.
### ConclusionReplacing a 3 hole bathroom faucet involves several essential aspects that require careful attention. By understanding and following the steps outlined in this article, you can successfully replace your old faucet with a new one, enhancing the functionality and aesthetics of your bathroom.

How To Replace 3 Hole Bathroom Sink Faucet

How To Replace 3 Hole Bathroom Sink Faucet

How Do You Change A 3 Hole Faucet To 1 At Home With Ashley

How Do You Change A 3 Hole Faucet To 1 At Home With Ashley

How Do You Change A 3 Hole Faucet To 1 At Home With Ashley

How Do You Change A 3 Hole Faucet To 1 At Home With Ashley

How To Install A Widespread Faucet The Home Depot

2 Handle 3 Hole Bathroom Sink Faucet With Pop Up Drain Household Replacement Accessories Temu

How Do You Change A 3 Hole Faucet To 1 At Home With Ashley

2 Handle 3 Hole Bathroom Sink Faucet With Pop Up Drain Household Replacement Accessories Temu
Related Posts