How to Stop a Dripping Bathroom Faucet
A dripping bathroom faucet is not only annoying but can also waste a significant amount of water and increase your water bills. Fortunately, fixing a dripping faucet is usually a relatively simple task that can be done with a few basic tools and materials.
Identifying the Source of the Leak
Before you start repairing the faucet, it is important to identify the source of the leak. The most common sources of leaks are:
- Worn or damaged O-rings or washers
- Loose or damaged cartridge
- Defective aerator
Tools and Materials You'll Need
To fix a dripping bathroom faucet, you will need the following tools and materials:
- Adjustable wrench
- Phillips screwdriver
- Flathead screwdriver
- New O-rings or washers (if needed)
- New cartridge (if needed)
- New aerator (if needed)
- Plumber's putty (optional)
Step-by-Step Instructions
Once you have identified the source of the leak and gathered the necessary tools and materials, you can follow these step-by-step instructions to fix the dripping faucet:
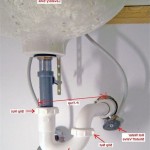
1. Turn off the water supply: Start by turning off the water supply to the faucet. There will usually be two shut-off valves under the sink, one for hot water and one for cold water. 2. Remove the aerator: If the leak is coming from the aerator, you can remove it by unscrewing it counterclockwise. 3. Replace the O-rings or washers: If the leak is coming from the handle, you will need to replace the O-rings or washers. To do this, use a screwdriver to remove the handle and then replace the old O-rings or washers with new ones. 4. Replace the cartridge: If the leak is coming from the cartridge, you will need to replace the cartridge. To do this, use a screwdriver to remove the cartridge and then replace it with a new one. 5. Reinstall the handle: Once you have replaced the O-rings or washers or the cartridge, you can reinstall the handle. 6. Reattach the aerator: If you removed the aerator, reattach it by screwing it clockwise onto the faucet. 7. Turn on the water supply: Once you have repaired the faucet, turn on the water supply and check for leaks. If you see any leaks, tighten the connections or replace the parts as needed.Tips for Preventing Dripping Faucets
To prevent bathroom faucets from dripping in the future, consider these tips:
- Install aerators with flow restrictors.
- Use low-flow faucets.
- Tighten the faucet handles regularly.
- Replace O-rings and washers when they start to show signs of wear.
- Call a plumber if you are unable to fix the dripping faucet yourself.
By following these instructions and tips, you can easily fix a dripping bathroom faucet and prevent future leaks.

How To Fix A Dripping Moen Faucet Howtolou Com

How To Fix A Leaky Faucet Guides For Every Design And Style

How To Fix A Leaking Bathtub Faucet Diy Family Handyman

Part 1 Of 2 How To Fix A Dripping Faucet

How To Fix A Bathroom Faucet 14 Steps

4 Easy Ways To Fix A Leaky Bathroom Sink Faucet With Double Handle

Bathroom Faucet Is Leaking Or Dripping

Water Dripping From Faucet Why And How To Fix

5 Reasons Your Faucet Is Dripping Water How To Fix It

How To Fix A Leaking Bathroom Faucet Quit That Drip
Related Posts