How to Paint a Moldy Bathroom Ceiling Fan
A bathroom ceiling fan can be a welcome addition to a bathroom, but in humid environments, these fixtures can be a breeding ground for mold. If your bathroom ceiling fan is showing signs of mold, it's important to address the issue as soon as possible. Mold can pose health risks and can also damage the fan itself. Painting the fan can help to cover up existing mold and prevent future growth.
This article will outline the steps involved in painting a moldy bathroom ceiling fan. It is important to note that this process involves working with electricity and chemicals; therefore, proper safety precautions should be taken at all times.
Preparing for the Project
Before you begin painting your bathroom ceiling fan, you will need to gather the appropriate materials and prepare the work area. Here's what you'll need:
- A ladder that is tall enough to reach the fan safely
- A drop cloth to protect the floor and surrounding area
- A screwdriver
- A paint scraper or putty knife
- A cleaning solution (vinegar and water or a commercial mold cleaner)
- A sanding block or sandpaper
- A primer specifically designed for surfaces prone to moisture
- Paint specifically designed for bathroom use
- Paint brushes
- A paint tray
- Safety goggles
- Gloves
- A respirator mask
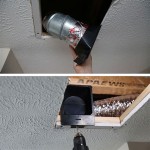
Once you have gathered your materials, you can begin preparing the fan for painting. This involves turning off the power to the fan at the circuit breaker and removing the fan blades.
Remove the fan blades by using a screwdriver to loosen the screws that hold them in place. Once the blades are removed, carefully place them on a drop cloth to prevent damage. Ensure that the power is off before working on the fan or wiring.
Cleaning the Fan
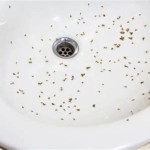
The next step is to clean the fan. Mold often grows in damp, dark areas, and bathroom ceiling fans are often situated in such environments. Before you begin cleaning, ensure that the fan is completely dry. If the fan is still wet, the moisture will prevent the cleaning solution from effectively removing the mold.
To clean the fan, you have two options: vinegar and water or a commercial mold cleaner. If you choose to use vinegar and water, mix equal parts vinegar and water in a spray bottle. Spray the solution onto the fan and let it sit for 10 minutes. Then, use a sponge or cloth to wipe away the mold and any residue. If using a commercial mold cleaner, follow the instructions provided by the manufacturer.
For particularly stubborn mold, you may need to use a paint scraper or putty knife to remove it. Be careful not to scratch the surface of the fan. Once the mold is removed, rinse the fan with clean water and dry it completely.
Preparing the Fan for Painting
After cleaning the fan, the next step is to prepare the surface for painting. This involves sanding the fan to create a smooth surface for the paint to adhere to. Use a sanding block or sandpaper to smooth out any rough spots or imperfections. If necessary, you can use a putty knife or a paint scraper to remove any loose paint or debris.
Once the fan is sanded, wipe it down with a damp cloth to remove any dust. Allow the fan to dry completely before proceeding to the next step.
Painting the Fan
Now that the fan is fully prepared, you can finally begin painting. The first step is to prime the fan. Priming the fan helps to create a smooth, even surface for the paint to adhere to. Using a primer specifically designed for surfaces prone to moisture is essential for long-lasting results. Apply the primer evenly to all surfaces of the fan, using a paintbrush.
After the primer has dried completely, you can apply the paint. Choose a paint specifically designed for bathroom use as it will be resistant to moisture and mildew. Apply the paint evenly using a paintbrush. It is important to avoid drips and runs. Apply multiple thin coats of paint rather than one thick coat. Let the paint dry completely between coats.
Reassembly and Final Touches
Once the paint has dried, you can reassemble the fan. First, reinstall the fan blades using the screws you removed earlier. Ensure that the screws are securely tightened. Then, reattach the fan to the ceiling, making sure that the electrical connections are secure and the power to the fan is switched off.
After the fan is reassembled, you can clean up any paint spills or drips. Remove the drop cloth and dispose of it appropriately. Finally, turn the power back on to the fan and test it to ensure it is working correctly.

What Is The Best Way To Remove Mold From Bathroom Ceiling

Cleaning Mrs Hinch Fans Share Tips To Remove Ceiling Mould Express Co

Bathroom Mold How To Identify And Get Rid Of In Environix

How To Clean Bathroom Ceiling Fans Simple Method

Bathroom Ceiling Mold Removal When To Clean Call Branch Environmental

How To Fix A Moldy Bathroom Ceiling

Bathroom Mold How To Identify And Get Rid Of In Environix

How To Get Rid Of Mold On Your Bathroom Ceiling Aqa

Ceiling Mold Growth Learn The Cause And How To Prevent It Environix

How To Prevent Mould On The Bathroom Ceiling Dbs Bathrooms
Related Posts