Replacing Bathroom Floor Rotted In Kitchen Sink
Introduction:
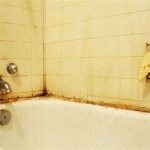
A rotten bathroom floor in the kitchen can be a major inconvenience. Not only is it unsightly, but it can also be a tripping hazard. In addition, rotten wood can lead to mold and mildew, which can be harmful to your health. Fortunately, replacing a rotten bathroom floor is not as difficult as it may seem. With a little time and effort, you can have your bathroom floor looking and feeling good as new.Tools and Materials:
- Pry bar - Hammer - Circular saw or reciprocating saw - Safety glasses - Earplugs - Dust mask - Gloves - New subflooring - New flooring - Nails or screws - Nail gun or drill - Caulk gun - Caulk - Sponge - Bucket of waterSafety First:
Before you begin, it is important to wear safety glasses, earplugs, dust mask, and gloves. This will help you avoid injury from flying debris, noise, or chemicals.Remove the Rotted Floor:
The first step is to remove the rotted floor. Using a pry bar and hammer, carefully pry up the rotted floorboards. Be careful not to damage the surrounding floorboards. Once the rotted floorboards are removed, you can use a circular saw or reciprocating saw to cut out the remaining rotted wood.Install the New Subflooring:
Next, you need to install new subflooring. The subflooring will provide support for the new flooring. Cut the new subflooring to size and then nail or screw it into place. Make sure the subflooring is level before proceeding to the next step.Install the New Flooring:
Now you are ready to install the new flooring. Cut the new flooring to size and then nail or screw it into place. Be sure to leave a small gap between the flooring and the walls to allow for expansion.Caulk the Floor:
Finally, you need to caulk the floor. Caulk will help to seal the gaps between the flooring and the walls and prevent water from seeping in. Apply a bead of caulk around the perimeter of the floor and then smooth it out with a sponge.Clean Up:
Once the caulk has dried, you can clean up the work area. Sweep or vacuum up any debris and dispose of it properly. Then, mop the floor with a bucket of water and sponge.Conclusion:
Replacing a rotten bathroom floor in the kitchen is not a difficult task if you follow the necessary steps. With a little time and effort, you can have your bathroom floor looking and feeling good as new.
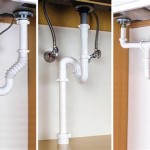
How To Replace Rotted Wood Under A Kitchen Sink Diy Guide Dengarden

Replace Sink Cabinet Floor

When Repairing The Bottom Of Cabinet Below Kitchen Sink Do I Need To Take Damaged Section Out Or Can Simply Put Plywood On Top It Quora

How To Replace A Rotten Kitchen Cabinet Floor 8 Simple Steps

We Repair Water Damaged Sink Base Cabinet Floor

How Do You Replace A Subfloor With Step By Pictures Bestlife52

How To Replace Rotted Wood Under A Kitchen Sink Diy Guide Dengarden

How To Fix Rotted Cabinet Bottom Floor Much Sink Install House Remodeling Decorating Construction Energy Use Kitchen Bathroom Bedroom Building Rooms City Data Forum

How Do I Repair My Water Damaged Sink Cabinet Hometalk

Rotted Sink Cabinet Floor How To Fix