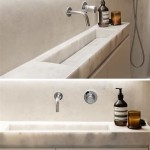
Fixing a Dripping Sink Faucet in Your Bathroom
A dripping faucet can be a constant source of annoyance, not to mention an unwelcome drain on your water bill. Fortunately, fixing a dripping sink faucet is a relatively simple task that most homeowners can tackle themselves. By understanding the common causes of dripping and learning a few basic repair techniques, you can restore your bathroom sink to a state of silence and efficiency.
Identifying the Cause of the Drip
The first step in fixing a dripping faucet is to identify the source of the leak. Many faucets are equipped with a washer that sits on a valve seat, and this washer wears down over time, causing leaks. Other causes include worn-out O-rings, a damaged cartridge, or a faulty valve stem.
To determine the exact cause, carefully observe the dripping faucet. Is it dripping steadily or only when the faucet is turned on? Does the dripping stop when the faucet handle is lifted or lowered? Answering these questions will help you narrow down the possible causes and determine the appropriate repair approach.
Tools and Materials
Before embarking on your faucet-fixing journey, gather the following tools and materials:
- Adjustable wrench
- Channel-lock pliers
- Phillips head screwdriver
- Flathead screwdriver
- Basin wrench
- Replacement washer
- Replacement O-rings (if necessary)
- Teflon tape
- Cleaning cloth
- Bucket
Repairing a Dripping Faucet: A Step-by-Step Guide
Once you've identified the problem, you can proceed with the repair. The following steps provide a general guideline for fixing a dripping faucet. Note that specific steps may vary depending on the faucet type and design.
Step 1: Shut Off the Water Supply
Locate the shut-off valve for your sink. This valve is typically located under the sink or on the wall behind the sink. Turn the valve clockwise to shut off the water supply to the faucet.
Step 2: Drain the Faucet
Open the faucet handle to release any remaining water inside the faucet. This will prevent water from spilling when you start working on the faucet.
Step 3: Remove the Faucet Handle
Most faucet handles are secured by a set screw. Use a Phillips head screwdriver to loosen the set screw and remove the handle. Some faucets may use a decorative cap that must be removed before accessing the set screw.
Step 4: Remove the Stem or Cartridge
Depending on the faucet design, you will either remove the stem or the cartridge. The stem is the metal rod that connects the handle to the valve. The cartridge is a single unit that contains both the stem and the valve.
To remove the stem, use an adjustable wrench to loosen the packing nut, which is located below the stem. To remove the cartridge, use a channel-lock pliers or a specialized cartridge removal tool. Once the old stem or cartridge is removed, inspect it for any damage. If the stem is worn or the cartridge is cracked, replace it with a new one.
Step 5: Clean and Replace the Washer
Once the stem or cartridge is removed, you can access the valve seat and washer. Use a cleaning cloth to remove any debris or mineral deposits from the valve seat. Carefully remove the old washer and replace it with a new one.
If you are replacing a stem, make sure to lubricate the stem with a small amount of petroleum jelly before re-inserting it into the faucet body. This will help to prevent future leakage.
Step 6: Reassemble the Faucet
Once the new washer is in place, reassemble the faucet in reverse order. Tighten the packing nut or the cartridge securely, but do not overtighten. Replace the stem or cartridge, then the faucet handle, and tighten the set screw.
Step 7: Turn on the Water Supply
Once you have reassembled the faucet, turn the water supply back on. Check for leaks around the faucet and under the sink. If you see any leaks, tighten the packing nut or cartridge further, or replace the washer.
If the leak persists, it may be an indication of a more serious problem, such as a cracked faucet body or a damaged valve stem. It may be necessary to call a plumber to diagnose and repair the issue.
Conclusion
With a little patience and some basic tools, you can fix a dripping sink faucet yourself. By following these instructions, you can save money on plumber fees and enjoy a quiet, leak-free bathroom.

5 Reasons Your Faucet Is Dripping Water How To Fix It

Properly Fixing A Leaky Sink Faucet Wallside Windows

How To Fix A Leaky Faucet True Value

How To Fix A Dripping Bathroom Faucet

5 Reasons Your Faucet Is Dripping Water How To Fix It

How To Fix A Leaky Faucet Handle

Part 1 Of 2 How To Fix A Dripping Faucet

How To Fix A Leaky Bathroom Sink Faucet

Water Dripping From Faucet Why And How To Fix

How To Fix A Leaky Faucet The Home Depot
Related Posts


