Essential Aspects of Installing a Bathroom Sink Plumbing
Installing a bathroom sink requires a careful understanding of essential plumbing procedures. Whether you're a seasoned DIY enthusiast or tackling plumbing for the first time, this comprehensive guide will empower you with the knowledge necessary for a successful installation.
Gathering Materials and PlanningBefore starting your installation, ensure you have all the necessary tools and materials. This includes a new sink, faucet, drain assembly, and plumbing wrench. Plan the location of your sink carefully to avoid any plumbing conflicts or potential obstacles.
Removing the Old SinkTurn off the water supply valves under the sink and disconnect the water lines. Unplug the drainpipe and carefully remove the old sink from the counter. Be mindful of sealant and any clips that may need to be loosened.
Installing the New SinkPlace the new sink in its designated position and gently lower it onto the counter. Apply a bead of silicone sealant around the sink's perimeter and smooth it out for a watertight seal. Tighten the mounting brackets or clips according to the manufacturer's instructions.
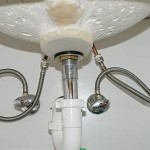
Connecting the FaucetConnect the water supply lines to the faucet and hand-tighten the nuts. Use a wrench or pliers to finalize the tightening, but avoid overtightening. Assemble the faucet handle and any decorative escutcheons.
Installing the Drain AssemblyFit the drain assembly into the sink's drain hole. Tighten the locknut from underneath the sink, ensuring a secure connection. Apply plumber's putty to the drain flange and insert it into the drainpipe. Tighten the slip nut to create a watertight seal.
Connecting the P-TrapConnect the P-trap to the drain assembly and secure it with slip nuts. The P-trap serves as a waterless barrier, preventing sewer gases from escaping into the room. Tighten the nuts sufficiently to prevent leaks.
Turning on the Water SupplySlowly turn on the water supply valves under the sink. Check for any leaks around the connections and tighten as necessary. Inspect the sink and faucet for proper operation and adjust the handles for desired flow and temperature.
Tips for SuccessUse Teflon tape on all threaded connections to prevent leaks. Lubricate O-rings and gaskets to ensure a proper seal. Position the drain assembly correctly to prevent clogging and slow drainage. Follow manufacturer's instructions carefully for specific requirements of your sink and faucet.
Remember, if you encounter any difficulties or have any doubts, it's advisable to consult a licensed plumber to ensure a safe and successful installation.

How To Install Bathroom Sink Drain Queen Bee Of Honey Dos

How To Fit A Bathroom Sink Diy Guides Victorian Plumbing

Bathroom Sink Plumbing Installation

Bathroom Sink Plumbing Installation Diy Montreal

Bathroom Sink Plumbing Installation Diy Montreal

How To Connect A Bathroom Sink Drain

How To Install Bathroom Sink Drain Queen Bee Of Honey Dos

Bathroom Sink Plumbing

Bathroom Sink Plumbing Diagram Diy Sinks Drain Kitchen Remodel

Here S How Install A Bathroom Pedestal Sink
Related Posts