Essential Aspects of Removing a Bathroom Vent Fan
Understanding the essential aspects of removing a bathroom vent fan is crucial to ensure safety, efficiency, and proper ventilation. Ignoring these aspects can lead to potential hazards, damage to the fan or surrounding area, and unsatisfactory results.
Safety Considerations
Before attempting to remove a bathroom vent fan, it is imperative to disconnect the power supply to prevent electrical shock or fire. Additionally, wearing a dust mask and safety glasses is recommended to protect against dust, debris, and potential flying particles.
Tools and Materials
Essential tools for removing a vent fan include a screwdriver (Phillips or flathead), pliers or a wrench, a putty knife, and a flashlight for visibility. You may also require replacement parts if the fan or housing is damaged.
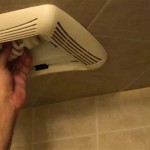
Removing the Vent Fan Cover
Locate the vent fan cover, typically held in place by screws or clips. Carefully remove the screws or disengage the clips using a putty knife or a flathead screwdriver. Handle the cover with care to avoid damage.
Disconnecting the Electrical Wiring
Locate the electrical wires connected to the vent fan motor. Using pliers or a wrench, carefully loosen the wire nuts and separate the wires. Mark each wire with tape or a label to ensure proper reconnection later.
Removing the Mounting Screws
Identify the mounting screws that secure the vent fan to the housing. Using a screwdriver, remove the screws and gently pull the fan out of the housing. Avoid excessive force to prevent damage to the housing or fan.
Cleaning the Housing
Once the fan is removed, inspect the housing for dust or debris accumulation. Use a vacuum cleaner or a damp cloth to clean the housing thoroughly, ensuring proper ventilation and optimal performance of the new fan.
Installing the New Vent Fan
Align the new vent fan with the housing and slide it into place. Secure it using the mounting screws. Reconnect the electrical wires by twisting them together and securing them with wire nuts. Replace the vent fan cover and secure it with screws or clips.
Restoring Power and Testing
Turn on the power to the bathroom and test the new vent fan. Ensure that it operates smoothly and quietly. If any issues arise, inspect the wiring, connections, or the fan itself for potential problems.
Conclusion
Removing a bathroom vent fan requires careful consideration of essential aspects such as safety, tools and materials, electrical wiring, and proper installation. By following these steps and adhering to the safety guidelines, you can remove the old vent fan and successfully install a new one, ensuring proper ventilation for your bathroom.

Not Sure How To Remove Old Bathroom Fan Install New One Doityourself Com Community Forums

How To Replace A Bathroom Exhaust Fan Stanley Tools

How To Replace A Bathroom Exhaust Fan Without Attic Access 12 Step Guide Home Inspector Secrets

Remove Install A Bathroom Fan Grille In 1 Min

Bathroom Exhaust Fan Lint Is A Fire Hazard Mini Mops House Cleaning

Help Can T Remove Old Bathroom Exhaust Fan Housing Doityourself Com Community Forums

Bathroom Vent Fan Remove Cover And Clean Dust

How To Remove Clean Bathroom Ceiling Fan Nutone

How To Replace A Bathroom Exhaust Fan Stanley Tools

How To Replace A Bathroom Exhaust Fan Stanley Tools
Related Posts