How To Remove a Bathroom Dome Light
Removing a bathroom dome light fixture is a common home improvement task, often undertaken for cleaning, bulb replacement, or fixture upgrades. While the process is generally straightforward, variations exist depending on the fixture's design and installation method. This guide provides a comprehensive overview of the most common removal procedures.
Safety Precautions
Prioritizing safety is paramount when working with electrical fixtures. The following precautions should always be observed:
- Turn off the power to the light fixture at the circuit breaker. Verify the power is off by flipping the light switch several times.
- Use a non-contact voltage tester to double-check that the power is off at the fixture wires.
- Use a stable stepladder or stool to reach the fixture safely.
- Have a helper hold the ladder steady if necessary.
- Wear safety glasses to protect eyes from dust and debris.
Tools and Materials
Gathering the necessary tools beforehand streamlines the removal process. Common tools needed include:
- Non-contact voltage tester
- Flathead screwdriver
- Phillips head screwdriver
- Stepladder or stool
- Pliers (needle-nose pliers can be helpful in some cases)
- Painter's tape (optional, for protecting the finish of the fixture)
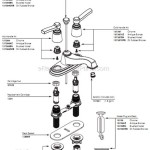
Removing a Dome Light Secured with Decorative Nuts
Many dome lights are held in place by decorative nuts that screw onto threaded posts extending from the mounting plate. The removal process for these fixtures typically involves the following steps:
- Locate the decorative nuts. These are typically located around the perimeter of the dome.
- Carefully unscrew the decorative nuts by hand or with pliers if they are tight. If the nuts are resistant, painter's tape can be used to protect the finish while using pliers.
- Once the nuts are removed, the dome should be free to come off. Gently lower the dome, being mindful of the wires connecting it to the electrical box.
Removing a Dome Light Secured with Spring Clips
Some dome lights are held in place by spring clips that press against the mounting plate. These can be a bit trickier to remove than decorative nuts. The following steps outline the general process:
- Carefully inspect the edge of the dome where it meets the ceiling or wall. Look for small slots or notches that indicate the location of the spring clips.
- Using a flathead screwdriver, gently apply pressure to the spring clip to release it from the mounting plate. This may require some maneuvering and patience. Work your way around the perimeter of the dome, releasing each clip in turn.
- Once all the clips are released, the dome should be free to come down. Carefully lower the dome, taking care not to damage the ceiling or wall.
Removing a Dome Light Secured with Screws
Less common, but still encountered, are dome lights secured directly to the mounting plate with screws. Removal for these fixtures is straightforward:
- Locate the screws holding the dome to the mounting plate. They may be hidden under decorative covers or trim.
- Using the appropriate screwdriver (usually a Phillips head), carefully remove the screws.
- Once the screws are removed, the dome can be detached from the mounting plate.
Disconnecting the Wiring
After the dome has been removed, the next step is to disconnect the wiring. Follow these steps carefully:
- Identify the wire connections. Typically, there will be two or three wires: black (hot), white (neutral), and sometimes a bare copper or green (ground) wire.
- Unscrew the wire connectors (also known as wire nuts) holding the wires together. Hold the base of the fixture while unscrewing the wire nuts to prevent stress on the wiring.
- Carefully separate the wires. If the wires are difficult to separate, gently twist them apart.
Removing the Mounting Plate (If Necessary)
In some cases, the mounting plate may also need to be removed. This typically involves removing screws that secure the plate to the electrical box.
- Locate the screws holding the mounting plate to the electrical box.
- Remove the screws and carefully detach the mounting plate.
Inspecting the Electrical Box
Once the fixture is removed, take the opportunity to inspect the electrical box for any damage or issues.
- Check for any loose or damaged wiring.
- Ensure the box is securely fastened to the ceiling framing.
How Do I Replace The Bulb In This Enclosed Bathroom Ceiling Light Hometalk
How To Remove A Dome Ceiling Light Change Lightbulb On Less Glass Cover Lamp Fixture
How To Remove A Dome Ceiling Light Change Lightbulb On Less Glass Cover Lamp Fixture
How To Remove The Light Cover In Room Frequently Asked Questions Leopalace21 Chintai Als Al Apartments And Monthly Mansion For Single Tenants
How To Remove Ceiling Light Cover No S 6 Steps Guide
How To Replace A Bathroom Light Fixture
How To Remove Ceiling Light Cover No S
How To Remove A Dome Ceiling Light Change Lightbulb On Less Glass Cover Lamp Fixture
Dome Ceiling Light Bulb Replacement Ifixit Repair Guide
How To Remove Glass Cover On Ceiling Light Doityourself Com Community Forums
Related Posts