How to Repair a Single Handle Delta Bathroom Sink Faucet
A leaky or malfunctioning sink faucet can be a major annoyance, but it doesn't have to be a costly repair. With a few simple tools and a little bit of know-how, you can easily repair a single handle Delta bathroom sink faucet yourself. Here's a step-by-step guide to help you get started:
Step 1: Gather Your Tools
Before you begin, you will need to gather the following tools:
- Phillips head screwdriver
- Adjustable wrench
- Needle-nose pliers
- Replacement cartridge (if necessary)
Step 2: Shut Off the Water Supply
Once you have your tools, the first step is to shut off the water supply to the faucet. There will be two shut-off valves located under the sink, one for the hot water and one for the cold water. Turn both valves clockwise to shut off the water.
Step 3: Remove the Handle
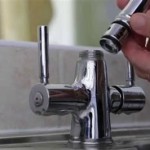
Once the water is turned off, you can remove the handle. Most Delta faucets have a small set screw on the side of the handle. Use a Phillips head screwdriver to remove the set screw, then pull the handle straight up to remove it.
Step 4: Remove the Cartridge
Once the handle is removed, you will see the cartridge. The cartridge is held in place by a retaining nut. Use an adjustable wrench to loosen the retaining nut, then remove the cartridge by pulling it straight out.
Step 5: Inspect the Cartridge
Once the cartridge is removed, inspect it for any signs of damage. If the cartridge is damaged, it will need to be replaced. If the cartridge is not damaged, you can simply clean it with a mild soap and water solution.
Step 6: Install the New Cartridge (If Necessary)
If the cartridge needs to be replaced, insert the new cartridge into the faucet body. Make sure that the cartridge is properly aligned, then tighten the retaining nut using an adjustable wrench.
Step 7: Reinstall the Handle
Once the cartridge is installed, you can reinstall the handle. First, align the handle with the faucet body. Then, push the handle down onto the faucet body until it is fully seated. Finally, insert the set screw and tighten it using a Phillips head screwdriver.
Step 8: Turn on the Water Supply
Once the handle is reinstalled, you can turn on the water supply. Open both shut-off valves under the sink counterclockwise to turn the water back on.
Step 9: Check for Leaks
Once the water is turned on, check for any leaks. If there are any leaks, tighten the retaining nut on the cartridge or the set screw on the handle until the leak stops.
Congratulations!
You have now successfully repaired your single handle Delta bathroom sink faucet. With a little bit of know-how, you can easily keep your faucets in good working order for years to come.

How To Rebuild A Delta Single Handle Faucet

How To Fix Leaky Bathroom Handle Delta Faucet Model 4530 Series Hard Water

Repair Parts For One And Two Handle Delta Bathroom Faucets

Diy And Save How To Repair Leaking Single Handle Faucets Kitchen Bath

Delta Repair Kit For Single Handle Faucets

How To Fix A Leaky Delta Style Bathroom Faucet

How To Repair A Single Handle Kitchen Faucet Diy Family Handyman

Delta Foundations 4 In Centerset Single Handle Bathroom Faucet With Metal Drain Assembly Chrome B510lf The Home Depot

Single Handle Centerset Bathroom Faucet In Chrome B512lf Delta

22c101 Delta Teck Commercial Single Handle Lavatory Faucet Chrome Amre Supply
Related Posts