Replacing Bathroom Sink Water Lines: Essential Aspects
Maintaining the plumbing system in your bathroom is crucial for ensuring a comfortable and functional space. Replacing sink water lines is an essential part of upkeep, and it's a task that homeowners can often tackle themselves with the right tools and know-how.
Understanding the essential aspects of replacing bathroom sink water lines is key to a successful repair. This article outlines the key considerations and steps involved in the process, providing a comprehensive guide for DIY enthusiasts. By following these essential aspects, you can effectively replace your water lines and restore the functionality of your bathroom sink.
Essential Aspects of Replacing Bathroom Sink Water Lines:
1. Safety First: Always turn off the main water supply before starting any plumbing work. This is essential to prevent accidental water damage and ensure a safe working environment.
2. Gather the Necessary Tools and Materials: Before commencing the replacement, ensure you have the necessary tools such as adjustable wrenches, pliers, and a basin wrench. You will also need new water supply lines, typically made of braided stainless steel or PEX tubing.
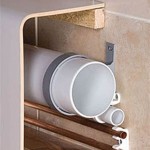
3. Locate and Disconnect the Old Lines: Identify the hot and cold water supply lines connected to the bathroom sink. Use an adjustable wrench to loosen and detach the nuts securing the lines to the faucet and shut-off valves.
4. Install the New Water Lines: Apply plumber's tape to the threads of the new water lines and hand-tighten them onto the shut-off valves. Use an adjustable wrench to further tighten the connections, ensuring a secure seal.
5. Connect to the Faucet: Attach the other ends of the water lines to the faucet using the same process as in step 4. Hand-tighten the nuts before using the adjustable wrench for a secure connection.
6. Turn on the Water Supply and Check for Leaks: Slowly turn on the main water supply and check for any leaks at the connections. If there are any leaks, use the adjustable wrench to further tighten the nuts until the leak stops.
7. Finalize and Clean Up: Once there are no leaks, use a damp cloth to wipe away any excess water and ensure the bathroom sink area is clean and tidy. Discard the old water lines.

Replace Bathroom Sink Water Supply Lines

How To Replace A Water Supply Line Replacing Faucet Toilet Lines

How To Replace A Faucet Water Supply Line Install Fluidmaster S Seal

Replace Bathroom Sink Water Supply Lines

How To Replace Bathroom Water Supply Lines Home Repair Tutor

How To Tighten Water Supply Line Connectors Diy Family Handyman

Do You Have A Leaking Bathroom Sink Learn About The Possible Causes Water Line Repair In Lake Worth Tx Benjamin Franklin Plumbing

4 Ways To Replace A Bathroom Sink Wikihow

Faucet Repair Guide How To A Leaky Howstuffworks

How To Install A Vessel Sink Faucet
Related Posts