How To Replace Water Supply Lines Bathroom Sink
Water supply lines are essential components of any bathroom sink, as they carry water from the main supply to the faucet. Over time, these lines can become worn or damaged, leading to leaks or other problems. If you're experiencing issues with your bathroom sink's water supply, it may be necessary to replace the lines.
Replacing water supply lines is a relatively simple task that can be completed in a few hours. However, it's important to follow the proper steps to ensure that the job is done correctly. Here's a step-by-step guide on how to replace water supply lines bathroom sink:
1. Gather Your Tools and Materials
Before you begin, you'll need to gather the following tools and materials:
*2. Turn Off the Water Supply
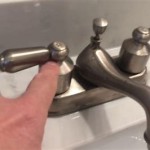
The first step is to turn off the water supply to the sink. There will be two shut-off valves under the sink, one for the hot water and one for the cold water. Turn both valves clockwise until they are fully closed.
3. Disconnect the Old Supply Lines
Use the adjustable wrench to loosen the nuts that connect the old supply lines to the faucet. Be careful not to overtighten the nuts, as this could damage the faucet. Once the nuts are loose, remove the old supply lines.
4. Apply Plumber's Putty
Apply a small amount of plumber's putty to the threads of the new supply lines. This will help to create a watertight seal.
5. Wrap Teflon Tape
Wrap a few layers of Teflon tape around the threads of the new supply lines. This will also help to create a watertight seal.
6. Connect the New Supply Lines
Screw the new supply lines into the faucet by hand. Once they are hand-tight, use the adjustable wrench to tighten them further. Be careful not to overtighten the nuts.
7. Turn On the Water Supply
Turn on the water supply to the sink. Check for leaks at the connections. If there are any leaks, tighten the nuts further until the leak stops.
8. Finish Up
Once you're sure that there are no leaks, you can finish up by placing the bucket under the sink to catch any drips. Run the water for a few minutes to make sure that everything is working properly.
Replacing water supply lines bathroom sink is a relatively easy task that can be completed in a few hours. By following the steps outlined in this guide, you can ensure that the job is done correctly and that your sink is back up and running in no time.

Replace Bathroom Sink Water Supply Lines

How To Replace A Faucet Water Supply Line Install Fluidmaster S Seal

How To Replace A Water Supply Line Replacing Faucet Toilet Lines

How To Replace Bathroom Water Supply Lines Home Repair Tutor

Replace Bathroom Sink Water Supply Lines

How To Tighten Water Supply Line Connectors Diy Family Handyman

Faucet Repair Guide How To A Leaky Howstuffworks

Sink Faucet Water Supply Line Replacement Ifixit Repair Guide

How To Replace Water Supply Line Plumbing Bathroom Sink Faucets

Here S How Install A Bathroom Pedestal Sink
Related Posts