Fix Bathroom Drain Trap: A Step-by-Step Guide
A clogged bathroom drain trap can be a nuisance, leading to slow drainage or even complete blockage. Fortunately, fixing it is a relatively simple task that can be tackled by most homeowners with basic tools. Here's a step-by-step guide to help you fix your bathroom drain trap efficiently:
Tools and Materials You'll Need:
- Adjustable wrench or pliers
- Bucket or bowl
- Rag or sponge
- Replacement drain trap (if necessary)
- Plumber's putty or Teflon tape (optional)
Step 1: Turn Off Water Supply
Before starting any work, ensure you turn off the water supply to the bathroom. Locate the water shut-off valve, usually under the sink or behind the toilet, and close it.
Step 2: Place Bucket Below Trap
Position a bucket or bowl beneath the drain trap to catch any water or debris that may drain out. Use a rag or sponge to absorb any spills.
Step 3: Loosen Trap Nuts
Using an adjustable wrench or pliers, carefully loosen the two nuts that connect the drain trap to the drainpipe and sink tailpiece. Avoid overtightening, as you may damage the nuts or pipes.
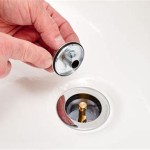
Step 4: Remove Old Trap
Once the nuts are loosened, gently pull the old drain trap down. Be prepared for some water to spill out, so keep the bucket or bowl in place.
Step 5: Inspect and Clean Trap
Examine the old trap for any blockages or debris. Remove any visible hair, soap scum, or other objects that may have caused the clog. If the trap is damaged or heavily corroded, it's advisable to replace it.
Step 6: Apply Plumber's Putty (Optional)
For additional sealing, apply a thin layer of plumber's putty or Teflon tape to the threads of the new drain trap or the mating surfaces of the drainpipe and sink tailpiece.
Step 7: Install New Trap
Align the new drain trap with the drainpipe and sink tailpiece, and hand-tighten the nuts. Gradually tighten the nuts further using the wrench or pliers, ensuring they are snug but not overtightened.
Step 8: Turn On Water Supply
Once the drain trap is installed, slowly turn on the water supply to the bathroom. Check for leaks around the connections and tighten the nuts if necessary.
Step 9: Test Drain
Run water into the sink or bathtub to test the drain. Ensure it drains smoothly and there are no leaks. If any leaks persist, tighten the nuts further or call a plumber for assistance.
Additional Tips:

Diy Plumbing Blog How To Clean A Drain Trap

How To Install P Trap And Bathroom Sink Drain Piping Easy Installation For Beginners

Replace A Trap And Add Cleanout Fine Homebuilding

How To Install A Pipe From Sink Drain Wall Ehow

How To Install The P Trap Under A Sink Dummies

How To Clean Out A Sink Trap Bailey Brothers Plumbing

How To Replace A Sink Drain P Trap Full Guide Fixed Today Plumbing

How To Plumb A Sink Through The Floor Complicated Install Links

The Most Effective Way To Clean A P Trap Asi Hastings

Replumbing An Improper Trap Home Improvement Stack Exchange Blog
Related Posts