How to Install a Bathroom Basin Mixer Tap
Installing a bathroom basin mixer tap can seem like a daunting task, but with the right tools and a little bit of patience, it can be done relatively easily. Here is a step-by-step guide on how to do it:
Tools and Materials:
- Adjustable wrench
- Pliers
- Phillips head screwdriver
- Tape measure
- Level
- Basin mixer tap
- Flexible hoses
- Plumber's putty
- Teflon tape
Instructions:
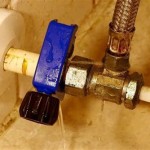
1. Turn off the water supply: Locate the water supply valves beneath the basin and turn them clockwise to shut off the water. Ensure that you completely turn off both the hot and cold water valves.
2. Disconnect the old tap: Use an adjustable wrench to loosen the nuts that connect the flexible hoses to the old tap. Once the nuts are loose, disconnect the hoses from the tap.
3. Remove the old tap: Use a screwdriver to remove the screws that secure the old tap to the basin. Once the screws are removed, gently lift the tap and remove it.
4. Clean the basin: Thoroughly clean the area around the tap holes in the basin using soapy water and a cloth. This will remove any dirt or debris that could interfere with the installation.
5. Apply plumber's putty: Apply a ring of plumber's putty around the base of the new tap. This will help create a watertight seal between the tap and the basin.
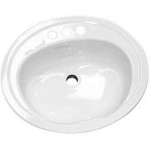
6. Insert the tap: Carefully insert the new tap into the holes in the basin. Ensure that the tap is properly aligned and level.
7. Secure the tap: Use the screws to secure the tap to the basin. Tighten the screws until the tap is firmly in place.
8. Connect the flexible hoses: Wrap Teflon tape around the threads of the flexible hoses and hand-tighten them onto the tap's inlet pipes. Use an adjustable wrench to further tighten the connections, ensuring they are not overtightened.
9. Turn on the water supply: Slowly open the water supply valves to let water flow through the tap. Check for any leaks around the connections.
10. Adjust the flow and temperature: Adjust the handle of the tap to verify that the water flow and temperature are as desired. If necessary, use an adjustable wrench to adjust the flow rate by tightening or loosening the small screws located on the handles.
Congratulations! You have successfully installed your bathroom basin mixer tap. If you encounter any difficulties during the installation process, do not hesitate to consult a qualified plumber for assistance.

Step By Guide Installing A Basin Mixer For Modern And Functional Bathroom Upgrade

How To Install A Basin Mixer Tap Bath User Guide On Vimeo

How To Install Wall Mounted Basin Faucet 2 Hole Mount Bathroom Sink Tap Installation Guide

How To Fit A Basin Mixer Tap Step By Guide Luna Spas

How To Fit A Basin Mixer Tap Victoriaplum Com

How To Easily Replace Basin Taps Step By

How To Install Basin Taps Replacing A Bathroom Sink Tap

Steps For How To Change A Mixer Tap Bathware Direct

How To Fit A Basin Mixer Tap Install Guides From Victoria Plum
Fitting A Bathroom Basin Tap The Diy