Bathroom Faucet Leaking From Handle: Essential Aspects
A bathroom faucet leaking from the handle can be a frustrating and potentially costly issue. Understanding the common causes and having the necessary tools will help you fix the leak and prevent further damage. This guide will provide you with comprehensive information on bathroom faucet leaks, including identifying the causes, gathering the necessary tools, and step-by-step instructions for fixing the leak.
Identifying the Causes
Before attempting to fix the leak, it is essential to identify its underlying cause. Here are the most common reasons for bathroom faucet leaks from the handle:
- Worn-out Washer: A washer is a small rubber or plastic disc that creates a seal between the handle and the faucet body. Over time, washers can become worn or damaged, leading to leaks.
- Loose Packing Nut: The packing nut is located beneath the handle and helps keep the stem in place. If the packing nut is loose, water can leak around the stem.
- Faulty Cartridge: Some faucets have a cartridge that controls water flow. A faulty cartridge can cause leaks from the handle.
- Damaged O-rings: O-rings are rubber seals that create watertight connections between different components. Damaged or worn O-rings can result in leaks.
Gathering the Necessary Tools
Once you have identified the cause of the leak, you will need to gather the appropriate tools for the repair. These may include:
- Adjustable wrench or pliers
- Screwdriver
- Replacement washer (if needed)
- Replacement packing nut (if needed)
- Replacement cartridge (if needed)
- Teflon tape
- Towel or cloth
Step-by-Step Repair Instructions
Before starting the repair, turn off the water supply to the faucet. Follow these steps to fix the leak:
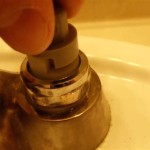
- Remove the Handle: Use an adjustable wrench or pliers to remove the handle. Be careful not to strip the threads.
- Replace the Washer: If the washer is worn or damaged, remove the old washer and replace it with a new one.
- Tighten the Packing Nut: If the packing nut is loose, use an adjustable wrench or pliers to tighten it. Avoid overtightening.
- Replace the Cartridge: If the cartridge is faulty, remove the old cartridge and replace it with a new one. Follow the manufacturer's instructions for cartridge replacement.
- Replace O-rings: If the O-rings are damaged, remove the old O-rings and replace them with new ones. Apply a small amount of silicone grease to the O-rings before installing them.
After completing the repair, turn on the water supply and check for leaks. If the leak persists, contact a qualified plumber for further assistance.
By following these steps and using the proper tools, you can effectively repair a bathroom faucet leaking from the handle. Remember to take safety precautions by turning off the water supply before starting the repair and using proper tools to avoid damage to the faucet or surrounding components.

How To Fix A Leaking Bathtub Faucet Diy Family Handyman

How To Fix A Bathroom Faucet 14 Steps

How To Fix A Leaky Single Handle Sink Faucet

How To Fix A Leaking Bathroom Faucet Handle Replacing Stem Assembly For

Simple Ways To Fix A Leaky Delta Bathroom Sink Faucet

How To Fix A Leaking Bathtub Faucet Diy Family Handyman

How To Fix A Leaky Bathroom Sink Faucet

How To Fix A Leaking Bathtub Faucet The Home Depot

How To Fix A Leaking Bathtub Faucet The Home Depot

How To Fix A Leaking Bathtub Faucet The Home Depot
Related Posts