Essential Aspects of Bathroom Sink Drain Stopper Installation
Maintaining a functional bathroom sink involves proper maintenance and occasional repairs. One crucial component that requires attention is the drain stopper. Whether you're installing a new stopper or replacing an old one, understanding the process is essential to ensure a secure and leak-free seal. Here are the key aspects to consider for a successful bathroom sink drain stopper installation:
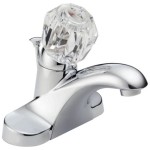
1. Identifying the Sink Type and Drain Stopper Compatibility
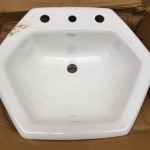
Before purchasing a drain stopper, determine the type of sink you have. Common types include ceramic, stainless steel, or fiberglass. Each type may require a specific type of drain stopper. Additionally, ensure the drain stopper is compatible with the size and thread type of your sink's drain opening.
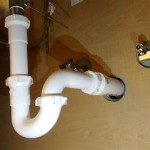
2. Preparing the Sink and Removing the Old Stopper (If Necessary)
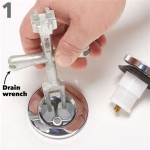
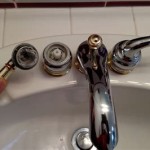
Start by cleaning the sink and drain area with a disinfectant solution to remove any dirt or debris. If you're replacing an old drain stopper, remove the lift arm connected to the operating lever beneath the sink. Use a pair of pliers or an adjustable wrench to unscrew the stopper from the sink hole.
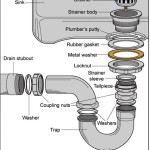
3. Applying Plumber's Putty and Installing the Stopper
Apply a layer of plumber's putty around the base of the new stopper, ensuring it forms a watertight seal. Carefully insert the stopper into the sink hole and tighten it by screwing it into place. Use an adjustable wrench or pliers, but avoid overtightening to prevent damage to the sink.
4. Reattaching the Lift Arm and Operating Lever
Once the stopper is secure, reconnect the lift arm to the operating lever beneath the sink. Ensure the lift arm is properly aligned and moves smoothly when the lever is lifted or lowered.
5. Testing for Leaks and Fine-tuning Adjustments
Turn on the faucet and fill the sink with water. Check for any leaks around the stopper and make necessary adjustments to the plumber's putty until the seal is watertight. If the water does not drain smoothly, adjust the lift arm or stopper as needed to improve drainage.
6. Maintenance and Cleaning Tips
To maintain the drain stopper's functionality, clean it regularly with a mild cleanser. Remove any hair or debris that may clog the drain. If the stopper becomes loose or damaged, repair or replace it promptly to prevent leaks and maintain sink efficiency.
Conclusion
Installing a bathroom sink drain stopper is a straightforward task that can be completed with a few essential tools and knowledge. By following these steps, you can ensure a secure and leak-free seal, contributing to the overall functionality and aesthetics of your bathroom.

Install A Drain Stopper So The Is Removable

How To Replace A Sink Stopper Quick And Simple Home Repair

Bathroom Sink Popup And Stopper Problems

Quick Tip 26 Pop Up Stopper Sticks Misterfix It Com

Step By Guide On How To Install Sink Pop Up Drain Stopper

How To Replace A Pop Up Sink Drain Remove The Old Bathroom Stopper Repair

How To Replace Or Maintain A Sink Pop Up Drain Assembly

Fixing Tricky Pop Up Drain Sink Stopper Mechanisms Efficient Plumber

How To Fix A Bathtub Or Sink Pop Up Stopper

How To Install A Metal Pop Up Sink Drain Assembly Symmons Industries
Related Posts