Bathroom Vanity Cabinet Door Replacement: A Comprehensive Guide
Updating the doors on your bathroom vanity cabinet can significantly enhance the overall aesthetic of your bathroom. Whether you're looking to refresh the look of your existing cabinet or replace damaged doors, this comprehensive guide will provide you with everything you need to know about bathroom vanity cabinet door replacement.
### Selecting the Right DoorsBefore starting the replacement process, it's crucial to choose the right doors for your vanity cabinet. Consider factors such as:
- Material: Wood, MDF, or laminate are popular options.
- Style: Shaker, flat-panel, or raised-panel doors are common styles.
- Color and Finish: Match the doors to your existing decor or choose a contrasting color for a statement piece.
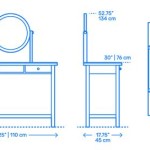
- Size: Measure the existing doors carefully before ordering replacements.
To complete the replacement, you'll need the following tools and materials:
- Measuring tape
- Screwdriver
- Drill
- Hinges (if not included with the doors)
- Wood filler (if necessary)
- Sandpaper
- Paint (if desired)
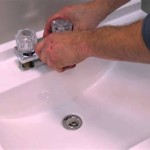
Using a screwdriver, carefully remove the screws holding the old doors in place. Gently pull the doors towards you to detach them from the cabinet frame.
### Step 2: Install the New Hinges (Optional)If your new doors do not come with pre-installed hinges, you'll need to install them. Align the hinges with the desired position on the doors and cabinet frame. Use a drill to create pilot holes and then screw the hinges in place.
### Step 3: Attach the New DoorsAlign the new doors with the cabinet frame and insert them into the hinge slots. Gently push on the doors to ensure they are securely attached.
### Step 4: Tighten the ScrewsUsing a screwdriver, tighten the screws holding the doors in place. Ensure that they are snug but not overtightened.
### Step 5: Fill in Any Gaps (Optional)If there are any small gaps between the doors and the cabinet frame, you can fill them in with wood filler. Apply the filler using a putty knife and then sand it smooth once it has dried.
### Step 6: Finish the Doors (Optional)If desired, you can paint or stain the new doors to match your desired aesthetic. Allow the finish to dry completely before using the cabinet.
### Tips for Troubleshooting * If the new doors are not fitting properly, check that they are the correct size and that the hinges are installed correctly. * If the doors are sagging, adjust the hinges by tightening or loosening the screws. * If the doors are sticking, sand down any rough edges or apply a lubricant to the hinges.
Diy Cabinet Doors And Drawer Covers For Bathroom Vanity Thediyplan

Update Your Bathroom Vanity With New Cabinet Doors The Handyman S Daughter

Upgrading Your Cabinet Doors Don T Forget The Bathroom Cabinetdoors Com

Update Your Bathroom Vanity With New Cabinet Doors The Handyman S Daughter

Update Your Bathroom Vanity With New Cabinet Doors The Handyman S Daughter

4 Tips For Refacing Bathroom Vanity Doors Cabinet Now

Diy Cabinet Doors And Drawer Covers For Bathroom Vanity Thediyplan

Diy Bathroom Vanity Makeover Nieu Cabinet Doors

Diy Bathroom Vanity Makeover Nieu Cabinet Doors

Update Your Bathroom Vanity With New Cabinet Doors The Handyman S Daughter
Related Posts