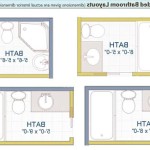
Best Way To Caulk Bathroom Vanity
Caulking a bathroom vanity is a crucial step in preventing water damage and maintaining a clean, aesthetically pleasing space. Proper caulking creates a watertight seal between the vanity top and the backsplash or wall, preventing moisture from seeping into the wall and causing mold, mildew, and structural damage. This article outlines the best practices for caulking a bathroom vanity, offering a comprehensive guide to achieving professional-looking, long-lasting results.
Preparing the Surface
Surface preparation is the foundation of a successful caulking job. A clean, dry surface ensures proper adhesion and prevents the caulk from peeling or cracking prematurely. Follow these key steps:
- Remove existing caulk: Use a caulk removal tool or utility knife to carefully scrape away old caulk. Ensure all residue is removed.
- Clean the surfaces: Use a suitable cleaning agent, such as rubbing alcohol or a mild bleach solution, to clean the vanity top and backsplash/wall. This removes any soap scum, mildew, or grease that could compromise adhesion.
- Dry the surfaces thoroughly: Allow the surfaces to dry completely before applying new caulk. Any remaining moisture can trap air bubbles and weaken the seal.
- Mask the surrounding areas (optional): Applying painter's tape along the edges of the vanity top and backsplash/wall creates clean, straight lines and protects surrounding surfaces from excess caulk.
Choosing the Right Caulk
Selecting the appropriate caulk is essential for a durable and effective seal. Consider these factors:
- Type of caulk: Silicone caulk is the preferred choice for bathroom applications due to its excellent water resistance, flexibility, and mold and mildew resistance. Look for a 100% silicone caulk specifically formulated for bathrooms.
- Color: Choose a caulk color that complements the vanity and surrounding surfaces. White or clear silicone caulk is commonly used.
- Application method: Caulk is available in tubes for use with a caulking gun or in squeeze tubes for smaller applications.
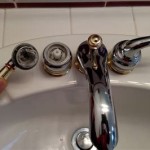
Applying the Caulk
Proper application techniques ensure a smooth, continuous bead of caulk that creates a watertight seal:
- Cut the caulk tube tip: Using a utility knife, cut the tip of the caulk tube at a 45-degree angle. The size of the opening should match the width of the gap being filled.
- Load the caulk gun: Insert the caulk tube into the caulking gun and puncture the inner seal using the built-in puncture tool.
- Apply steady pressure: Holding the caulking gun at a consistent angle, apply even pressure to the trigger while moving the gun along the joint. Aim for a continuous bead of caulk without gaps or interruptions.
- Smooth the bead: Immediately after applying the caulk, use a wet finger or a caulk smoothing tool to smooth the bead and create a concave surface. This ensures a professional-looking finish and enhances the seal's effectiveness.
Clean Up and Drying Time
Proper clean-up and drying time are essential for achieving a long-lasting, effective seal:
- Remove excess caulk: Wipe away any excess caulk from surrounding surfaces using a damp cloth or sponge before it dries.
- Remove masking tape (if used): Carefully remove the painter's tape while the caulk is still wet to prevent tearing the newly applied bead.
- Allow the caulk to dry: Consult the manufacturer's instructions for the recommended drying time. Typically, silicone caulk requires 24 hours to fully cure.
Maintaining the Caulk
Maintaining the caulk will extend its lifespan and effectiveness. Key actions include:
- Regular cleaning: Clean the caulk regularly with a mild bathroom cleaner to prevent mildew and soap scum buildup.
- Inspect for damage: Periodically inspect the caulk for signs of cracking, peeling, or discoloration. Repair any damaged areas promptly to prevent water damage.
Troubleshooting Common Issues
Addressing common caulking problems can improve the longevity and appearance of the seal. Consider these tips:
- Caulk peeling: Ensure the surfaces were properly cleaned and dried before application. Consider using a primer to improve adhesion.
- Cracked caulk: Movement between the vanity top and backsplash/wall can cause cracking. Use a flexible silicone caulk designed for bathroom applications.
- Mildew growth: Ensure adequate ventilation in the bathroom to prevent mildew. Clean the caulk regularly with a mildew-resistant cleaner.
Tools and Materials Needed
Having the necessary tools readily available streamlines the caulking process. Essential tools include:
- Caulk removal tool
- Utility knife
- Cleaning agent (rubbing alcohol or mild bleach solution)
- Caulk (100% silicone bathroom caulk)
- Caulking gun (for tube caulk)
- Caulk smoothing tool or wet finger
- Damp cloth or sponge
- Painter's tape (optional)

Should You Caulk Around A Bathroom Vanity Bathtubber

How To Seal Vanity Top Storables

How To Caulk Bathroom Counter With Dap Remove Old Silicone Desolvit

How To Caulk Like A Professional The Home Depot

Score Caulk That Holds The Vanity Sink To Cabinet Small Bathroom Vanities Remodel Modern

Here S How To Caulk Around Bathroom And Kitchen Fixtures

How To Caulk Or Re A Vanity

Should You Caulk Around A Bathroom Vanity Bathtubber

Bathroom Vanity Caulking Suggestions Needed Doityourself Com Community Forums

How To Fill Gap Between Vanity And Wall 7 Solutions
Related Posts