Best Way To Paint Wood Bathroom Cabinets
Part of Speech:** Noun
The process of painting wood bathroom cabinets involves several essential aspects that significantly impact the overall outcome. These aspects encompass the selection of suitable paint, thorough preparation of the cabinets, proper application techniques, and meticulous attention to detail. This article will delve into each of these essential aspects, providing comprehensive guidance to achieve a professional-grade painted finish on your wood bathroom cabinets.
1. Selecting the Right Paint**
The first step in painting wood bathroom cabinets is choosing the right paint. Opt for a paint specifically designed for bathroom use, which can withstand moisture and humidity. Consider semi-gloss or satin finishes for their durability and ease of cleaning.
2. Preparing the Cabinets**
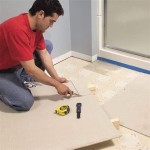
Thorough preparation is paramount for a successful paint job. Remove all hardware from the cabinets, and clean them thoroughly with a degreaser to remove any dirt or grime. Sand the cabinets lightly with fine-grit sandpaper to smooth out any imperfections.
3. Applying the Paint**
Apply two thin coats of paint to achieve an even finish. Use a brush or roller for the larger surfaces and a small brush for the edges and details. Allow ample drying time between coats.
4. Detailing and Finishing**
Once the paint has dried completely, reattach the hardware. Caulk any gaps between the cabinets and the walls or countertops for a clean and professional look. Apply a clear topcoat to protect the paint from wear and tear.
Painting wood bathroom cabinets requires a systematic approach and attention to detail. By following the essential aspects outlined above, you can transform your cabinets into a stunning focal point that enhances the overall aesthetic of your bathroom.

2. Preparing the Cabinets**
Thorough preparation is paramount for a successful paint job. Remove all hardware from the cabinets, and clean them thoroughly with a degreaser to remove any dirt or grime. Sand the cabinets lightly with fine-grit sandpaper to smooth out any imperfections.
3. Applying the Paint**
Apply two thin coats of paint to achieve an even finish. Use a brush or roller for the larger surfaces and a small brush for the edges and details. Allow ample drying time between coats.
4. Detailing and Finishing**
Once the paint has dried completely, reattach the hardware. Caulk any gaps between the cabinets and the walls or countertops for a clean and professional look. Apply a clear topcoat to protect the paint from wear and tear.
Painting wood bathroom cabinets requires a systematic approach and attention to detail. By following the essential aspects outlined above, you can transform your cabinets into a stunning focal point that enhances the overall aesthetic of your bathroom.
How To Paint A Bathroom Vanity Love Remodeled

How To Paint Bathroom Cabinets Without Sanding 8 Vital Steps Grace In My Space

How To Paint Laminate Cabinets Love Renovations

How To Paint Bathroom Cabinets Without Sanding 8 Vital Steps Grace In My Space

How To Paint Cabinets Last Painting A Bathroom Vanity Maison De Pax
.jpg?strip=all "Painting A Bathroom Vanity Again Dream Green Diy")
Painting A Bathroom Vanity Again Dream Green Diy

Painting Bathroom Cabinets Nq Property Care

How To Paint Your Bathroom Vanity The Easy Way

Transform Your Bathroom Vanity In A Weekend Making Pretty Spaces Blog

How To Paint Bathroom Vanity Cabinets Tutorial Benjamin Moore
Related Posts