Delta Bathroom Two Handle Faucet Repair: A Comprehensive Guide
Maintaining a functional bathroom faucet is crucial for a comfortable and efficient home. However, even the most durable faucets can encounter issues over time, requiring repair or replacement. If you notice leaks, drips, or difficulty operating the handles of your Delta bathroom two handle faucet, following these steps can help you troubleshoot and resolve the problem effectively.Tools and Materials You'll Need:
* Adjustable wrench * Phillips-head screwdriver * Flat-head screwdriver * Allen wrench (if applicable) * Replacement parts (if necessary)Troubleshooting and Repair Steps:
1. Isolate the Water Supply:
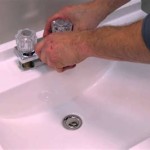
Before starting any repair, turn off the water supply to the faucet by locating the shut-off valves beneath the sink. Cold water valves are typically marked with blue handles, while hot water valves are marked with red handles.2. Remove the Faucet Handles:
Using a screwdriver, carefully remove the screws or caps that secure the handles. Gently pull the handles off the stems. If they are difficult to remove, use a penetrating oil or lubricant to loosen them up.3. Check the Packing Nut:
Once the handles are removed, you will see a packing nut around the base of each stem. Ensure that the nut is snug but not overtightened. If it is loose, use an adjustable wrench to tighten it slightly. Overtightening can damage the packing nut and lead to leaks.4. Inspect the Washers:
Remove the packing nut and inspect the washers beneath it. Look for signs of wear, damage, or debris. Replace any damaged or worn-out washers with new ones of the same size and type.5. Check the Stems:
If replacing the washers did not resolve the issue, you may need to inspect the stems. Remove the screws or caps that secure the stems and pull them out carefully. Check the O-rings and seals for damage or wear. Replace any faulty components.6. Reassemble the Faucet:
After replacing any necessary parts, reassemble the faucet in reverse order. Start by inserting the stems and securing them with the screws or caps. Install new packing nuts and tighten them snugly. Finally, reattach the handles and tighten the screws or caps.7. Restore the Water Supply:
Once the faucet is reassembled, turn on the water supply valves and check for any leaks. If you notice any drips or leaks, repeat the steps to ensure that all components are properly tightened and sealed.Tips for Preventing Future Issues:
* Regularly clean the faucet and handles to remove mineral deposits and debris. * Check the packing nuts and washers periodically for wear or damage. * Avoid using abrasive cleaners that can damage the faucet's finish. * If you are unsure about any repair steps, consult a qualified plumber for assistance. By following these steps and tips, you can effectively repair your Delta bathroom two handle faucet and restore it to full functionality. Regular maintenance can also help prevent future issues, ensuring that your bathroom remains a comfortable and functional space.
Simple Ways To Fix A Leaky Delta Bathroom Sink Faucet

Simple Ways To Fix A Leaky Delta Bathroom Sink Faucet

How To Fix Leaky Bathroom Handle Delta Faucet Model 4530 Series Hard Water

Repair Parts For One And Two Handle Delta Bathroom Faucets

Simple Ways To Fix A Leaky Delta Bathroom Sink Faucet

Repair Parts For One And Two Handle Delta Bathroom Faucets

How To Fix A Leaky Delta Two Handle Faucet

Delta Faucet Repair Parts Faucets Bathroom Single Lever

How To Replace A Two Handle Faucet Delta Blog

How To Fix A Leaky Delta Two Handle Faucet
Related Posts