Essential Aspects of Delta Single Lever Bathroom Faucet Repair
Maintaining a functional bathroom faucet is essential for a comfortable and efficient bathroom experience. Repairs, when necessary, should be addressed promptly to prevent further issues and ensure optimal faucet performance. Understanding the crucial aspects of Delta Single Lever Bathroom Faucet Repair is key to effective troubleshooting and restoration.
Identifying the Problem
The first step in repairing a Delta Single Lever Bathroom Faucet is accurately identifying the problem. Common issues include leaks, drips, and difficulty in adjusting water temperature or flow. Pinpointing the specific malfunction will guide the appropriate repair approach.
Gathering Tools and Parts
Before commencing the repair, gather the necessary tools and replacement parts. Essential tools include a basin wrench, adjustable wrench, screwdriver, and pliers. Whether replacing the cartridge, handle assembly, or other components, ensure you have the correct Delta-compatible parts on hand.
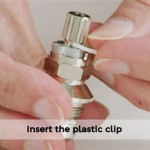
Disassembling the Faucet
To access the internal components of the faucet, careful disassembly is required. Follow the manufacturer's instructions or refer to online guides for step-by-step instructions on removing the handle, spout, and other parts, as necessary.
Replacing the Cartridge
The cartridge is a crucial component regulating water flow and temperature. If the cartridge is defective, it may result in leaks, drips, or difficulty in controlling water output. Replacing the cartridge involves removing the handle assembly, unscrewing the old cartridge, and installing the new one.
Reassembling the Faucet
Once the necessary repairs or replacements are made, carefully reassemble the faucet in reverse order of disassembly. Tighten all connections securely, avoiding overtightening, which could damage components. Ensure the handle assembly operates smoothly and adjust the water temperature and flow as desired.
Testing and Troubleshooting
After reassembling the faucet, turn on the water supply and test its functionality. Inspect for any leaks or drips, and ensure the water temperature and flow are adjusted correctly. If any issues persist, refer to the troubleshooting guide or consider consulting a professional plumber for further assistance.
By understanding these essential aspects of Delta Single Lever Bathroom Faucet Repair, you can effectively troubleshoot and restore your faucet to optimal working condition. With methodical disassembly, precise replacement, and careful reassembly, you can ensure a functional and reliable bathroom faucet.

How To Rebuild A Delta Single Handle Faucet

How To Repair A Delta Tub Shower Valve

Repair Parts For One And Two Handle Delta Bathroom Faucets

Delta Repair Kit For Crystal Knob Handle Single Lever Faucets Rp77739 The Home Depot

Repairing A Leaky Delta Bath Or Shower Faucet Single Lever And Setting Temp

Old Delta Shower Faucet Repair Made Easy

Delta Foundations 4 In Centerset Single Handle Bathroom Faucet With Metal Drain Assembly Chrome B512lf The Home Depot

How To Replace The Cartridge In A Single Handle Delta Faucet Repair

Delta Faucet Repair Kit True Value

Delta Geist Spotshield Brushed Nickel Widespread 2 Handle Watersense Bathroom Sink Faucet With Drain In The Faucets Department At Com
Related Posts