Essential Aspects of DIY Bathroom Sink Backsplash
Creating a custom backsplash behind your bathroom sink is an easy and cost-effective way to add a personal touch to your space. Whether you're looking to add a pop of color, create a more cohesive look, or simply protect your wall from water damage, a DIY bathroom sink backsplash is a great option.
To achieve a successful DIY bathroom sink backsplash, several essential aspects need to be considered. These include choosing the right materials, preparing the surface, installing the backsplash, grouting, and sealing.
1. Choosing the Right Materials
The first step in creating a DIY bathroom sink backsplash is choosing the right materials. The most common materials used for backsplashes are tile, stone, glass, and metal. Each material has its advantages and disadvantages, so choosing the one that best suits your needs is important.
Tile is a versatile and durable option that comes in a wide range of colors, styles, and finishes. Stone is also a durable option but can be more expensive than tile. Glass is a beautiful and stylish option, but it is more fragile than tile or stone. Metal is a modern and sleek option but can be more challenging to install than tile or stone.
2. Preparing the Surface
Once you have chosen the materials for your backsplash, you need to prepare the surface. This involves cleaning the wall, removing any existing backsplash, and leveling the surface. If the wall is uneven, you may need to use a backer board to create a smooth surface for your backsplash.
3. Installing the Backsplash
The next step is to install the backsplash. This process will vary depending on the material you choose. For tile, you will need to apply thin-set mortar to the wall and then set the tiles in place. For stone, you will need to use a mortar adhesive. For glass, you will need to use a silicone adhesive. For metal, you will need to use screws or nails.
4. Grouting
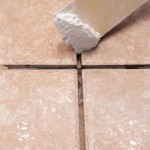
Once the backsplash is installed, you need to grout the joints between the tiles. Grout is a cement-based material that helps to hold the tiles in place and protects them from water damage. To apply grout, you will need to mix it with water according to the manufacturer's instructions. Then, use a grout float to apply the grout to the joints between the tiles.
5. Sealing
The final step is to seal the backsplash. This will help to protect it from water damage and stains. To seal the backsplash, you will need to apply a sealant to the surface of the tiles. You can use a brush or a roller to apply the sealant. Allow the sealant to dry according to the manufacturer's instructions.

Brilliant Bathroom Backsplash Ideas Family Handyman

Small Bathroom Remodel Easy Diy Tile Backsplash Engineer Your Space

Small Band Of Glass Tile Is A Pretty And Cost Effective Backsplash For Bathroom Diy Ideas Home Decor Tips Remodeling

Small Bathroom Remodel Easy Diy Tile Backsplash Engineer Your Space

10 Amazing Bathroom Backsplash Ideas To Beautify Your Bath Simple Designs Diy Vanity

Small Bathroom Remodel Easy Diy Tile Backsplash Engineer Your Space

62 Bathroom Backsplash Ideas For A Stylish Makeover White Subway Tile Vanity Designs

23 Bathroom Backsplash Ideas Sebring Design Build Inspiration Decor Remodel Designs Interior

Diy Bathroom Adhesive Tile Backsplash The Home Depot

24 Ideas For A Creative Bathroom Backsplash


