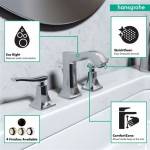
How to Fix a Leaky Delta Bathroom Faucet
A leaky faucet can be a major annoyance, wasting water and driving up your utility bills. If your Delta bathroom faucet is leaking, don't despair. With a few simple tools and a little know-how, you can fix it yourself in no time.
Identifying the Source of the Leak
The first step is to identify the source of the leak. There are three main places where a Delta bathroom faucet can leak:
- The handle: A leak from the handle is usually caused by a worn-out O-ring or washer.
- The spout: A leak from the spout is usually caused by a clogged aerator or a damaged O-ring.
- The base: A leak from the base is usually caused by a loose nut or a damaged gasket.
Tools and Materials You'll Need
Once you've identified the source of the leak, you'll need to gather the following tools and materials:
- Allen wrench or hex key
- Flathead screwdriver
- Phillips head screwdriver
- Adjustable wrench
- Replacement O-rings or washers (if necessary)
- Plumber's putty (if necessary)
Fixing the Leak
Once you have your tools and materials assembled, you can begin fixing the leak. The specific steps involved will vary depending on the source of the leak, but the general procedure is as follows:
- Turn off the water supply: Use the shut-off valves under the sink to turn off the water supply to the faucet.
- Remove the handle: Use the Allen wrench or hex key to remove the screw that holds the handle in place. Then, pull the handle straight up to remove it.
- Replace the O-ring or washer: If the leak is coming from the handle, you'll need to replace the O-ring or washer. To do this, simply remove the old O-ring or washer and replace it with a new one.
- Reassemble the faucet: Once you've replaced the O-ring or washer, reassemble the faucet in reverse order.
If the leak is coming from the spout, you'll need to replace the aerator or O-ring.
- Remove the aerator: Use a wrench to unscrew the aerator from the spout.
- Clean or replace the aerator: If the aerator is clogged, simply clean it with a vinegar solution. If the aerator is damaged, you'll need to replace it with a new one.
- Reassemble the faucet: Once you've cleaned or replaced the aerator, reassemble the faucet in reverse order.
If the leak is coming from the base, you'll need to tighten the nut or replace the gasket.
- Tighten the nut: Use an adjustable wrench to tighten the nut that holds the base of the faucet in place.
- Replace the gasket: If the nut is already tight, you'll need to replace the gasket. To do this, simply remove the old gasket and replace it with a new one.
- Reassemble the faucet: Once you've tightened the nut or replaced the gasket, reassemble the faucet in reverse order.
Once you've fixed the leak, turn on the water supply and check for leaks. If there are no leaks, you're all set!

Simple Ways To Fix A Leaky Delta Bathroom Sink Faucet

How To Repair Leaking Dripping Delta Faucet Diyplumbing Serviceplumbing Tappplumbing

Simple Ways To Fix A Leaky Delta Bathroom Sink Faucet

Sink Faucet Repair Delta Bathroom Drips

Simple Ways To Fix A Leaky Delta Bathroom Sink Faucet

How To Fix A Leaky Delta Style Bathroom Faucet

How To Get The Gunk Out Of Your Faucet

Learn How To Fix A Leaky Faucet Delta Bathroom

How To Fix A Leaky Faucet Delta Blog

How To Repair A Leaky Delta Faucet
Related Posts