How Do I Install a Bathroom Vanity Top
Installing a bathroom vanity top is an essential part of any bathroom renovation. It involves securely attaching the vanity top to the bathroom vanity cabinet to create a functional and stylish surface. To achieve a successful installation, several essential aspects need to be considered, from selecting the right vanity top material to using the appropriate tools and techniques.
This article explores the core aspects of installing a bathroom vanity top, providing step-by-step instructions and highlighting important considerations to ensure a durable and visually appealing result.
1. Choosing the Right Vanity Top Material
The material of the vanity top significantly impacts its durability, aesthetics, and ease of maintenance. Common vanity top materials include:
* Granite: A durable and heat-resistant natural stone, but can be expensive. * Marble: A luxurious natural stone with a classic appearance, but requires sealing to prevent staining. * Quartz: An engineered stone that is non-porous, scratch-resistant, and available in various colors. * Solid Surface: A man-made material that is seamless, non-porous, and can be molded into custom shapes. * Laminate: A cost-effective option that provides a wide range of styles and colors, but can be less durable than natural stone.2. Preparing the Vanity Cabinet
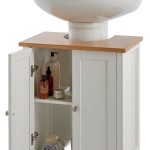
Before installing the vanity top, the vanity cabinet must be prepared to ensure a secure fit. This involves leveling the cabinet and installing support brackets if necessary. The vanity top will rest on these brackets, providing additional support and stability.
3. Installing the Vanity Top
The vanity top is typically secured to the vanity cabinet using a combination of adhesive and screws. The adhesive creates a bond between the vanity top and the cabinet, while the screws provide additional strength. The installation process involves:
* Applying a bead of adhesive around the perimeter of the vanity cabinet. * Carefully placing the vanity top on the adhesive and aligning it with the cabinet. * Tightening the screws through the pre-drilled holes in the vanity top and into the cabinet.4. Finishing Touches
After the vanity top is installed, it is important to seal the seams between the vanity top and the backsplash or wall. This prevents water damage and enhances the aesthetics of the installation. A matching caulk or sealant should be used to create a watertight seal.
5. Troubleshooting Common Issues
During the installation process, certain issues may arise. Here are some common problems and their potential solutions:
* Vanity top not level: Adjust the support brackets or use shims to level the vanity top. * Vanity top not flush against the wall: Check the alignment of the cabinet and vanity top and adjust accordingly. * Screws are not tight: Use a screwdriver to tighten the screws securely. * Visible seams: Ensure that the caulk or sealant is applied evenly and smoothly to create a seamless appearance.Conclusion
Installing a bathroom vanity top requires careful planning, attention to detail, and the use of appropriate materials and techniques. By understanding the essential aspects discussed in this article, homeowners or DIY enthusiasts can achieve a successful and durable installation that enhances the functionality and aesthetic appeal of their bathroom.

How To Install A Bathroom Vanity

Replace Vanity Top And Faucet Diy Network

How To Replace A Bathroom Countertop Homeadvisor

How To Remove Replace A Vanity Top Easy Bathroom Sink Remodel

Master Bathroom Remodel Part 8 How To Install New Tile Counter Tops Simply Designing With Ashley

How To Install A Bathroom Vanity And Sink

How To Install Or Remove A Bathroom Vanity Homeserve Usa

How To Get Replacement Countertops For Your Bathroom Vanity Trubuild Construction

How To Install A Pre Made Vanity Top Stagg Design

Diy Replace Vanity Top
Related Posts