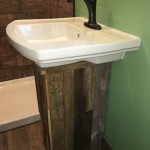
How Do I Install A Drop In Bathroom Sink
Installing a drop-in bathroom sink is a relatively simple plumbing project that can be completed in a few hours. However, it is important to follow the steps carefully to ensure a proper installation and long-lasting performance. Before beginning, gather all necessary tools and materials including a new sink, basin wrench, adjustable wrench, screwdriver, level, caulk gun, and caulk.
Step 1: Remove the Old Sink
If there is an existing sink, begin by turning off the water supply valves located under the sink. Next, disconnect the water supply lines by unscrewing the nuts that connect them to the sink faucets. Use an adjustable wrench for this task. Once the water supply is disconnected, use a basin wrench to loosen and remove the nuts securing the sink to the countertop. Carefully lift the sink out of the countertop.
Step 2: Prepare the Countertop
Clean the countertop surface where the new sink will be installed. Use a degreaser to remove any dirt or oil that may interfere with the adhesion of the caulk. Once the countertop is clean and dry, apply a bead of caulk around the perimeter of the sink cutout.
Step 3: Install the Sink
Carefully place the new sink into the countertop cutout. Align the sink with the caulk bead and press down firmly to ensure a good seal. Use a level to check that the sink is level from side to side and front to back. Adjust the sink as needed by tapping it with a piece of wood and a hammer until it is level.
Step 4: Connect the Water Supply
Attach the water supply lines to the sink faucets by hand-tightening the nuts. Use an adjustable wrench to tighten the nuts further, but be careful not to overtighten. Turn on the water supply valves and check for leaks. If any leaks are detected, tighten the nuts further until the leak stops.
Step 5: Install the Drain
Install the drain assembly according to the manufacturer's instructions. Typically, this involves inserting the drain flange into the drain hole in the sink and securing it with a nut. Then, attach the drainpipe to the drain flange and tighten the connection.
Step 6: Seal Around the Sink
Apply a bead of caulk around the perimeter of the sink where it meets the countertop. Use your finger or a caulk tool to smooth the caulk and create a watertight seal. Allow the caulk to dry completely before using the sink.
Step 7: Clean Up
Once the installation is complete, clean up the work area and remove any debris or tools. Turn on the water and check for leaks. If there are no leaks, the installation is complete and the sink is ready to use.

Drop In Bathroom Sink Replacement

Ge Sealants How To Install A Drop Sink

How To Install A Drop In Bathroom Sink

How To Install A Bathroom Sink Step By Guide

How To Replace A Drop In Bathroom Sink Step By

How To Replace A Drop In Bathroom Sink Step By

How To Install Bathroom Sink Top Mount In Quartz

How To Replace And Install A Bathroom Sink

How To Install A Drop In Bathroom Sink And Attach It Countertop

Drop In Bathroom Sink Pros Cons How To Install
Related Posts