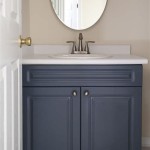
How Do I Repair a Chip in My Bathroom Vanity?
A chipped bathroom vanity can detract from the overall aesthetic of your bathroom. However, repairing the chip is a relatively simple and inexpensive task that can be completed in a few hours. With the right materials and techniques, you can restore your vanity to its former glory.
Essential Materials:
* Epoxy or acrylic filler * Mixing tray * Mixing sticks * Spatula or putty knife * Sandpaper (various grits) * Tack cloth * Wood filler (optional) * Clear nail polish (optional)Step-by-Step Instructions:
1. Clean and Prepare the Surface: * Clean the chipped area thoroughly with a damp cloth to remove any dirt or debris. * Lightly sand the edges of the chip to create a clean and smooth surface for the filler to adhere to. 2. Prepare the Filler: * Follow the manufacturer's instructions to mix the epoxy or acrylic filler. * Use the mixing tray and sticks to ensure a thorough blend. 3. Fill the Chip: * Using a spatula or putty knife, apply the filler to the chip. * Fill the chip completely, slightly overfilling to allow for sanding. 4. Smooth the Filler: * Smooth the filler using the spatula or putty knife. * Make sure the surface is level with the surrounding area. 5. Sand the Surface: * Once the filler has hardened (check manufacturer's instructions), sand it down using sandpaper. * Start with a coarse grit (e.g., 100-grit) and gradually move to a finer grit (e.g., 220-grit). * Sand until the repaired area is smooth and level. 6. Apply Wood Filler (Optional): * If the chip is particularly deep or has caused any surrounding damage, you may need to apply wood filler to fill in any gaps or gouges. * Apply the wood filler according to the manufacturer's instructions and sand it smooth once hardened. 7. Seal the Surface (Optional): * To prevent the repaired area from water damage, apply a thin coat of clear nail polish over the sanded surface. * This will create a protective barrier and enhance the durability of the repair.Tips:
* Use a color-matched epoxy or acrylic filler to ensure a seamless repair. * If the chip is large, you may need to use multiple layers of filler to build up the surface. * Allow each layer to completely dry before sanding. * Be patient and take your time to ensure a professional-looking repair.
How To Patch A Porcelain Sink Himg Surface Repair

How To Repair A Ed Or Chipped Bathroom Sink

How To Fix A Ed Porcelain Sink 8 Steps Prudent Reviews

Thrifty Mum Gets Rid Of A Giant In Her Bathroom Sink Using Easy Repair Kit And Saves Herself Hundreds The Sun

Sink Repair Happy Tubs Bathtub

Tips To Repair Ed Or Chipped Bathroom Countertops Doityourself Com

How To Repair A Hairline In Porcelain Sink 6 Steps

How Can I Repair A Hole In Vanity Sink Hometalk

Sink Repair Happy Tubs Bathtub

How To Fix A Chip In Bathroom Vanity Bunnings Work Community
Related Posts