Fixing a Leaky Delta Bathroom Faucet: A Step-by-Step Guide
A leaky bathroom faucet can be a persistent annoyance, wasting water and potentially causing damage to your bathroom. Fixing a Delta bathroom faucet is a relatively straightforward task that can be accomplished with minimal plumbing knowledge. If you're experiencing a leaky Delta faucet, follow these steps to fix it quickly and effectively.
Identify the Source of the Leak
The first step is to identify the source of the leak. Common sources include the handle, the base of the faucet, or the spout. To find the leak, turn on the water and inspect the faucet for water droplets. Once you've located the leak, you can proceed with the appropriate repair.
Tools and Materials
Before starting the repair, gather the necessary tools and materials. You'll need a Phillips head screwdriver, an adjustable wrench, and possibly replacement parts such as washers or O-rings. You can usually find all the necessary parts at your local hardware store.
Handle Leak Repair
If the leak is coming from the handle, follow these steps:
-
1. Turn off the water supply to the faucet.
2. Remove the handle screw with a Phillips head screwdriver.
3. Lift the handle off the valve stem.
4. Inspect the O-rings and washers for damage or wear.
5. Replace any damaged O-rings or washers with new ones.
6. Reassemble the handle and tighten the handle screw.
7. Turn on the water supply and check for leaks.
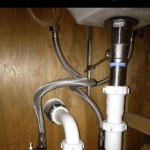
Base Leak Repair
If the leak is coming from the base of the faucet, follow these steps:
-
1. Turn off the water supply to the faucet.
2. Use a wrench to remove the packing nut, located at the base of the faucet.
3. Inspect the packing washer and replace it if it is damaged or worn.
4. Apply a new layer of plumber's tape around the threads of the packing nut.
5. Reassemble the packing nut and tighten it securely.
6. Turn on the water supply and check for leaks.
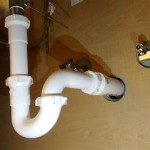
Spout Leak Repair
If the leak is coming from the spout, follow these steps:
-
1. Turn off the water supply to the faucet.
2. Remove the aerator, if present, using a wrench or pliers.
3. Use a wrench to loosen the spout nut, located at the base of the spout.
4. Inspect the O-ring or washer for damage and replace it if necessary.
5. Reassemble the spout and tighten the spout nut securely.
6. Turn on the water supply and check for leaks.
Additional Tips
Here are a few additional tips for fixing a leaky Delta bathroom faucet:
-
1. If the leak persists after following the above steps, contact a professional plumber.
2. Regular maintenance can help prevent leaks. Clean the faucet regularly and check for worn or damaged parts periodically.
3. Avoid using harsh chemicals or abrasive cleaners on your faucet, as they can damage the finish.

Simple Ways To Fix A Leaky Delta Bathroom Sink Faucet

How To Repair Leaking Dripping Delta Faucet Diyplumbing Serviceplumbing Tappplumbing

Simple Ways To Fix A Leaky Delta Bathroom Sink Faucet

Sink Faucet Repair Delta Bathroom Drips

Simple Ways To Fix A Leaky Delta Bathroom Sink Faucet

How To Fix Leaky Bathroom Handle Delta Faucet Model 4530 Series Hard Water

Learn How To Fix A Leaky Faucet Delta Bathroom

Simple Ways To Fix A Leaky Delta Bathroom Sink Faucet

How To Get The Gunk Out Of Your Faucet

Repair A Leaking Delta 1700 Shower Faucet Instructables
Related Posts