How to Tile Around a Bathroom Sink: A Step-by-Step Guide
Tiling around a bathroom sink can seem like a daunting task, but with the right tools and techniques, it's a project that can be completed even by DIY enthusiasts. Follow these step-by-step instructions to create a professional-looking tile job around your bathroom sink.
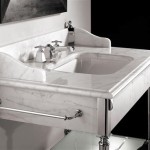
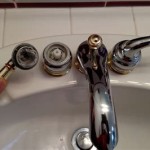
1. Preparation
The first step is to prepare the area around the sink. Remove the sink and any fixtures, then clean the surface thoroughly with a degreaser. Allow the surface to dry completely.
2. Measure and Cut Tiles
Measure the area around the sink to determine the number of tiles needed. Use a tile cutter to cut the tiles to fit the space, including notches for the sink rim and faucet.
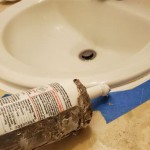
3. Apply Thin-set Mortar
Apply a layer of thin-set mortar to the wall and the back of the tiles using a notched trowel. The notches will help create a strong bond between the tiles and the surface.
4. Set the Tiles
Place the tiles on the wall, starting from the bottom corner. Use a level to ensure the tiles are straight. Tap the tiles gently with a rubber mallet to set them securely.
5. Tile the Sink Rim
To tile around the sink rim, cut a strip of tile that is as wide as the rim and slightly longer than the circumference. Apply thin-set mortar to the rim and place the tile strip on top. Use a wet sponge to smooth and shape the mortar around the edges.
6. Grout the Tiles
Once the tiles have been set for at least 24 hours, apply grout to the joints between them. Use a grout float to push the grout into the gaps and smooth it out. Allow the grout to dry completely.
7. Seal the Grout
To protect the grout from moisture, apply a grout sealer. Use a small brush or sponge to apply the sealer to the grout joints. Allow the sealer to dry completely before using the sink.
Tips for Success
* Use a high-quality thin-set mortar and grout for a stronger and more durable installation. * Allow ample drying time for the mortar and grout before grouting or sealing. * Use a razor blade to remove any excess grout that may have been smeared on the tiles. * Clean the tiled area regularly with a mild soap solution to keep it looking its best.
Bathroom Design Getting Tile Around The Vanity Right

62 Bathroom Backsplash Ideas For A Stylish Makeover White Subway Tile Vanity Designs

Backsplash Advice For Your Bathroom Would You Tile The Side Walls Too Designed

Backsplash Advice For Your Bathroom Would You Tile The Side Walls Too Designed

Bathroom Tile Ideas For Small Bathrooms

How To Install Backsplash Bathroom Tile Easy Simple

62 Bathroom Backsplash Ideas For A Stylish Makeover Remodel Tile Vanity

Brilliant Bathroom Backsplash Ideas Family Handyman

How To Install A Glass Tile Vanity Top Diy

Tile Bathroom Countertops
Related Posts