How to Assemble a Bathroom Vanity Cabinet
Assembling a bathroom vanity cabinet is a crucial task that requires attention to essential aspects. Understanding the parts involved, following the instructions meticulously, and ensuring proper alignment are the key elements in achieving a successful assembly process. This article will delve into the essential aspects of assembling a bathroom vanity cabinet, providing detailed guidance on each step to ensure an efficient and satisfactory outcome.
The term "How to Assemble a Bathroom Vanity Cabinet", when taken as a whole, serves as a noun phrase. This phrase describes a task and implies a process that involves multiple steps. Each step requires specific tools, materials, and procedures to ensure the proper assembly of the vanity cabinet.
1. Preparation and Tools
Before embarking on the assembly process, it is essential to gather the necessary tools and materials. A screwdriver, hammer, level, measuring tape, and safety glasses are typically required. Additionally, ensure you have all the hardware and parts, including hinges, screws, and handles, as per the manufacturer's instructions.
2. Base Assembly
Begin by assembling the base of the vanity cabinet. Connect the side panels to the front and back panels using screws. Use a level to ensure the base is level and square. Attach the bottom panel to the base structure, ensuring it is flush with the edges.
3. Drawer Assembly
Assemble the drawers by attaching the drawer sides and fronts to the drawer bottom. Use wood glue and screws to ensure a secure fit. Install the drawer slides onto the sides of the cabinet and insert the drawers. Adjust the slides to ensure smooth operation.
4. Countertop Installation
Position the countertop onto the assembled base. Use a level to ensure it is level and overhangs the cabinet evenly on all sides. Secure the countertop using screws or adhesive, following the manufacturer's instructions.
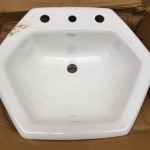
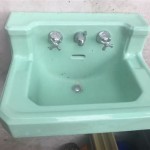
5. Sink Installation
Cut an opening in the countertop for the sink, following the template provided. Place the sink into the opening and secure it using mounting hardware. Connect the plumbing lines and test for any leaks.
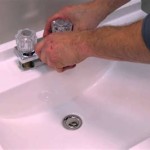
6. Door Installation
Attach the door hinges to the door and cabinet frame. Position the door and align it properly. Use a level to ensure it is vertical and adjust the hinges accordingly. Install the door handles or knobs.
7. Finishing Touches
Once all the components are assembled, check for any loose screws or fittings and tighten them as needed. Apply a sealant around the sink and countertop to prevent water damage. Install decorative elements such as a backsplash or mirror to complete the look of the vanity cabinet.
Assembling a bathroom vanity cabinet may seem like a daunting task, but by following these essential aspects and adhering to the manufacturer's instructions, you can achieve a professionally finished and functional piece that enhances the aesthetics of your bathroom.

How To Install A Bathroom Vanity

How To Install A Bathroom Vanity

How To Install Or Remove A Bathroom Vanity Homeserve Usa

How To Install Bathroom Vanity Units That Make Your Friends Jealous

How To Install A Bathroom Vanity 4 Easy Steps

12 Easy Steps To Install Bathroom Vanity And Sink

How To Replace Install A Bathroom Vanity And Sink Small Vanities Diy Trendy

Tutorial How To Install A Bathroom Vanity The Diy Playbook

How To Install A Vanity Forbes Home

How To Install A Bathroom Vanity 101